Author: Ren Rose

  • The Quiet Joy of Autumn Walks

    The Quiet Joy of Autumn Walks

    There’s something about autumn that makes even the simplest walk feel magical. Maybe it’s the way that the air shifts – crisp enough to make you pull your jumper close, but still gentle, carrying the faint scent of woodsmoke. Or maybe it’s the colours, the fleeting transformation when every street and park feels like it has been painted in shades of gold, amber and burnt oranges.

    I have started to make a habit of going for autumn walks – sometimes with friends, sometimes with family. There is no agenda. It is just me, a path and the season unfolding in front of me. And honestly? It has become one of the things that I look forward to the most at this time of year.

    Here, in Devon, one of the places I always return to is Arlington Court. This National Trust property, with its grand regency house and sprawling estate, is tucked away into the countryside like a secret waiting to be rediscovered each season. In the summer, it is lush and green, but in autumn, it becomes something else entirely – a canvas of fiery rouge, earthy browns and rusty tones, with crisp leaves underfoot and the stately house standing quietly at the centre of it all.

    Walking Through the Grounds

    Every time I walk through the paths at Arlington Court, I notice something new. The estate is vast, with miles of trails that journey through woodland, gardens and open parkland. From the reception, as you wander the path, the house slowly comes into view – a stately building that seems to watch over the grounds. The house itself is filled with history and curiosities, but in autumn, it is the grounds that truly steal the show. 

    The trees seem to shift daily, their leaves glowing brighter in colour before gently falling to the rest on the ground. The lake, framed by trees that glow like fire in the afternoon light, is always a favourite stop. The reflections are often so perfect they feel like paintings, and if you are lucky, you may catch sight of wildlife moving quietly through the estate. 

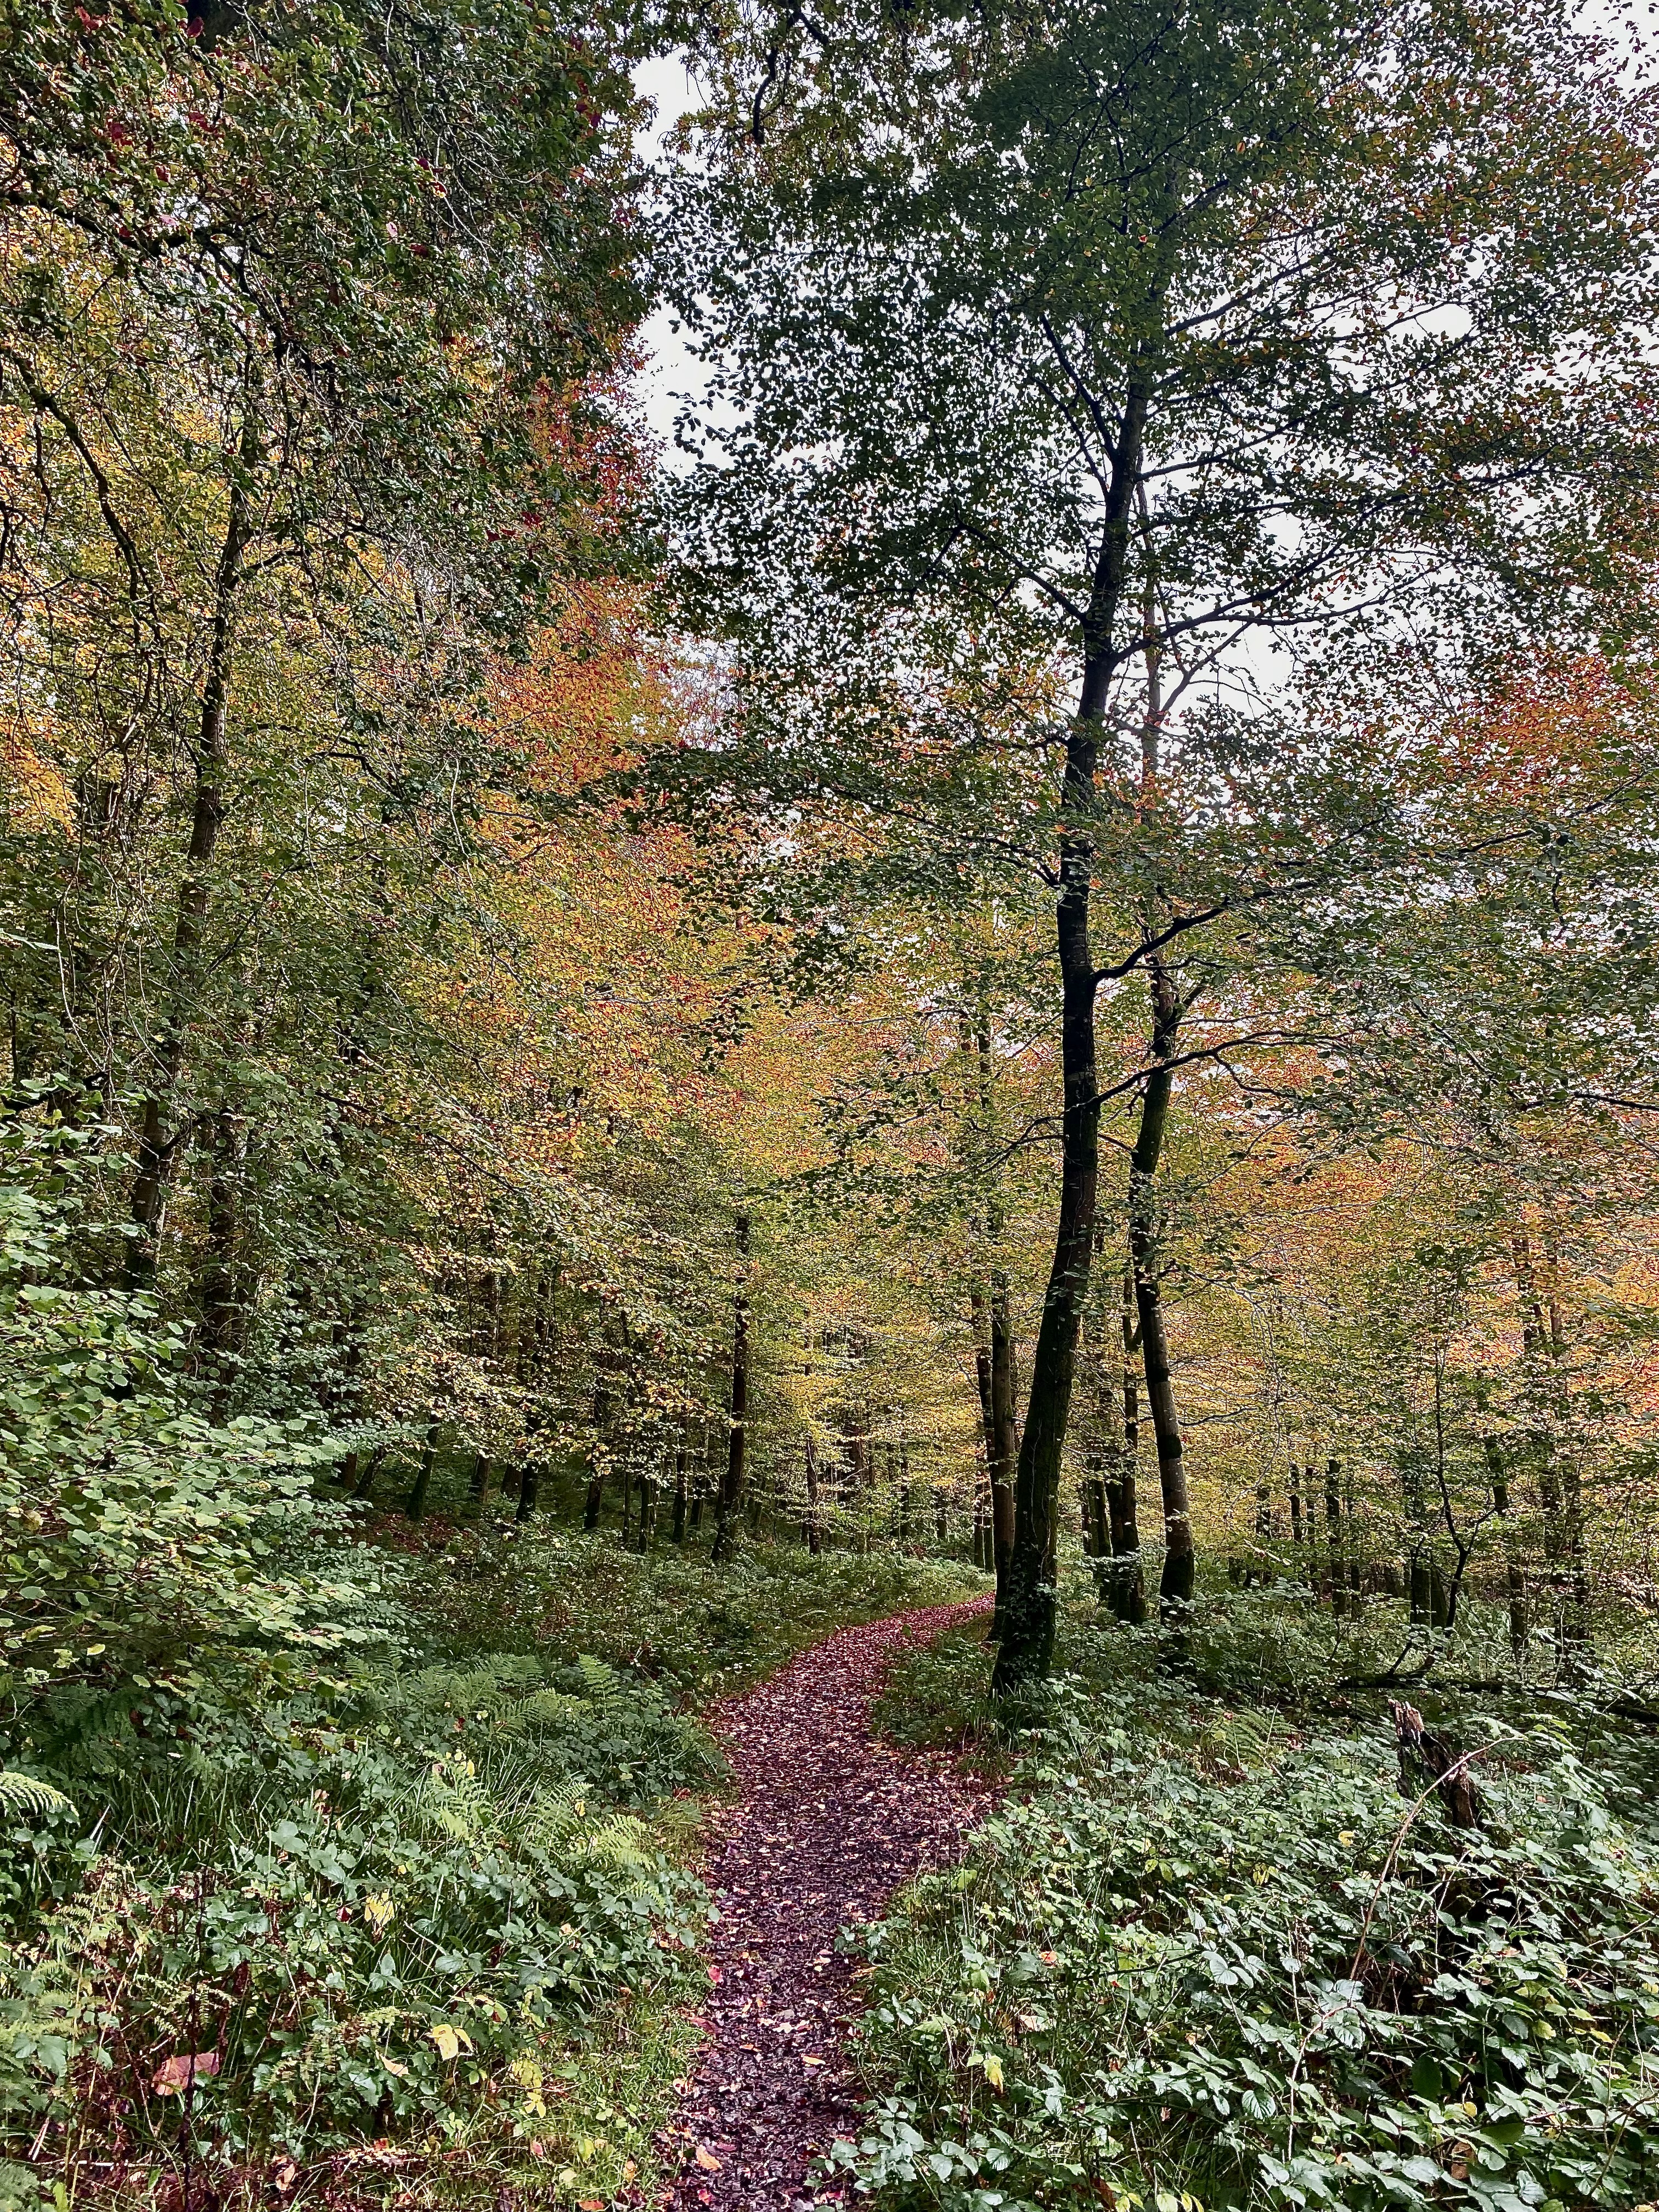
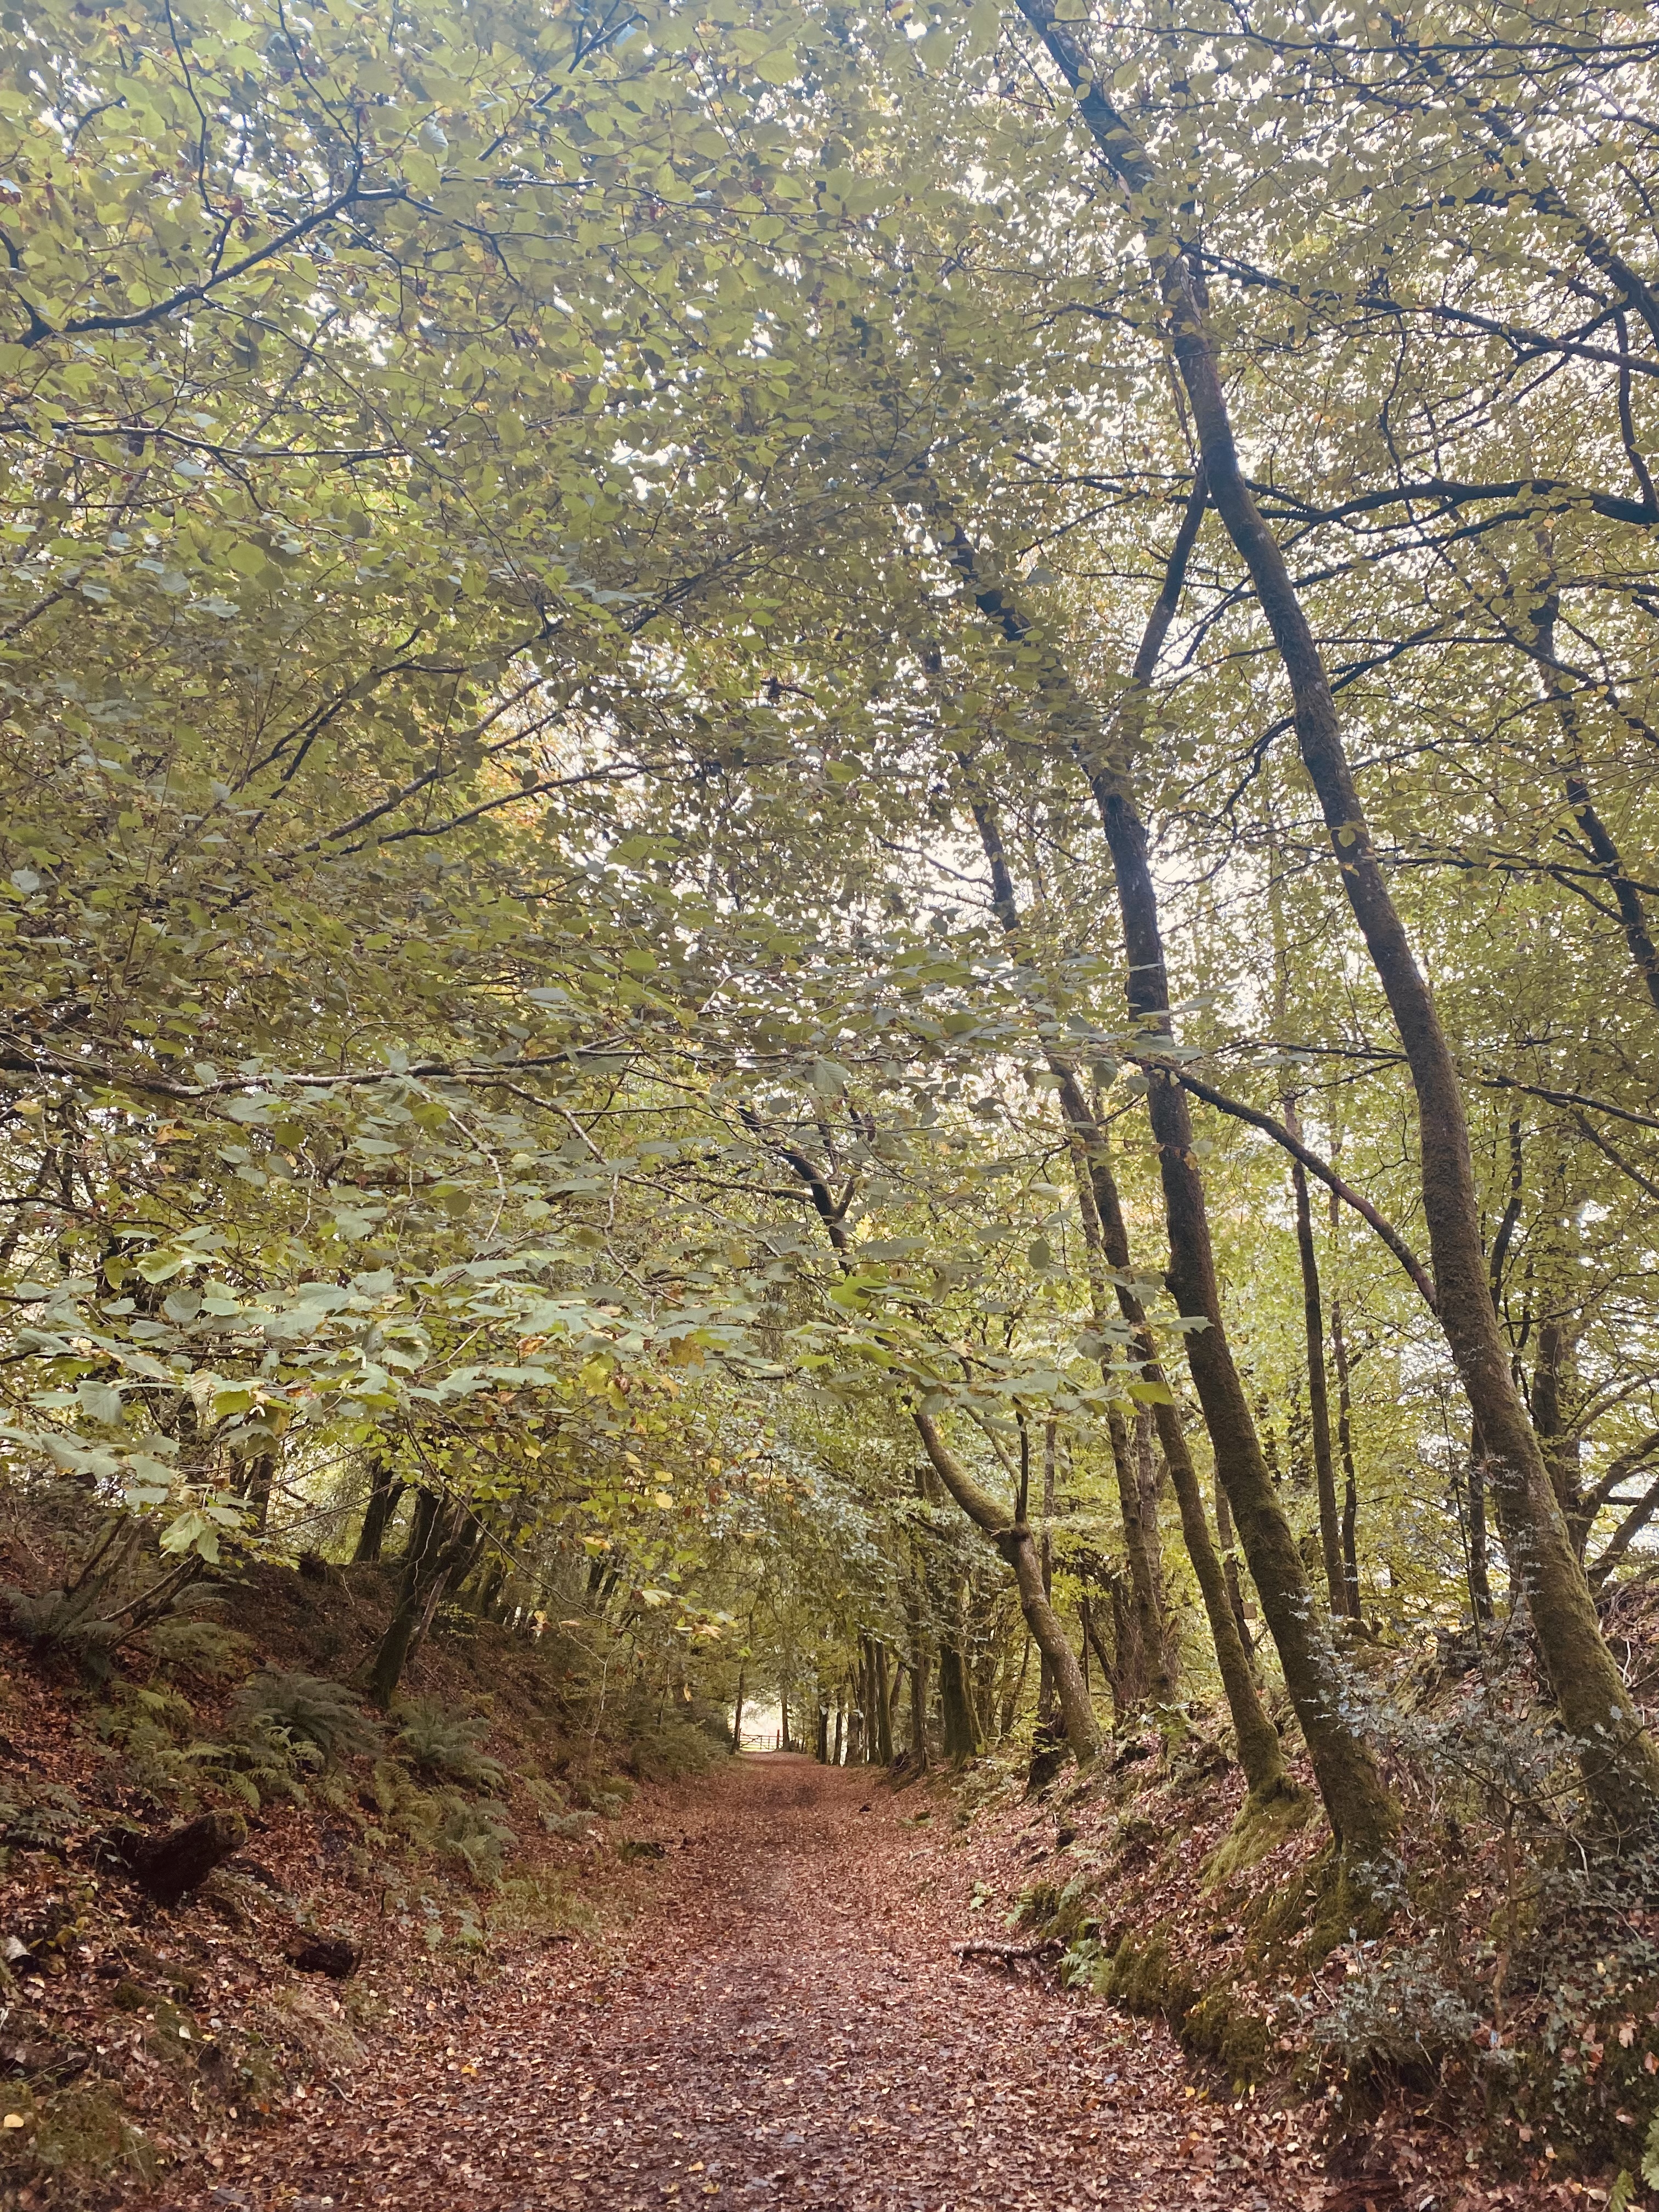
    Walk further, and you come across the winding paths through dense woodland, where the sound of your boots crunching leaves becomes the soundtrack. 

    There’s something especially grounding about walking through the estate in autumn. The crunch of the leaves, the faint smell of damp earth – it feels timeless, as though generations before me have taken the same steps, felt the same crisp air, and marveled at the same transformation of the season.

    A Place to Pause

    What I love most about Arlington Court is the stillness. Even on the days when visitors wander the gardens, there are quiet corners where you can pause and simply be. I like to bring a thermos of tea with me, sipping as I sit on a bench beneath a canopy of copper leaves. There is no rush – just a sense of being held by the season.

    Sometimes, I take out my phone to capture the details – the patterns of leaves on the ground, the reflection of intertwined branches in the pond, or the way the afternoon sun filters through the trees. Other times, I leave my phone behind and just listen to the rustle of the wind, the call of birds overhead, the crunch of my own boots meeting the blanket of leaves on the floor. 

    Walking at Arlington Court has become a ritual, a way of grounding myself in a season that is all about change. It reminds me to embrace the transition, to notice beauty in the small details, and to slow down enough to feel the moment. 

    I think that’s the joy of autumn walks, no matter where you are; they invite you to be present. Whether it is a grand estate in rural Devon or a local park at the end of your street, stepping outside into the shifting season can reset your spirit in the gentlest of ways. 

    So if you find yourself nearby, I cannot recommend a walk at Arlington Court enough. Bundle up, bring a warm drink and let the autumn air guide you through the paths that are both timeless and ever-changing. 

  • Perfect Roast Chicken: A Farmhouse Classic for Autumn Gatherings

    Perfect Roast Chicken: A Farmhouse Classic for Autumn Gatherings

    There’s nothing quite like the smell of roast chicken filling the house on a Sunday afternoon. It’s a dish that feels timeless – simple, comforting, and always a crowd-pleaser. With crispy golden skin, tender meat, and savoury aromas, roast chicken is a farmhouse staple that never goes out of style. Whether it’s the centrepiece of a family meal or the star of a quiet, cosy dinner, this recipe will help you achieve that perfect balance of flavour and comfort.

    Why Roast Chicken?

    • Comforting & nostalgic – a dish that feels like home.
    • Versatile – pairs with almost any side, from roast potatoes to seasonal vegetables.
    • Budget-friendly – feeds the family and leaves leftovers for soups, sandwiches, or pies.
    • Impressive yet simple – a golden roast chicken always looks (and tastes) special.

    Ingredients (Serves 4–6)

    • 1 whole chicken (about 1.8–2 kg)
    • 2 tablespoons olive oil or softened butter
    • 1 lemon, halved
    • 1 garlic bulb, halved horizontally
    • A few sprigs of fresh rosemary and thyme
    • Salt and freshly ground black pepper

    Optional Vegetables for Roasting:

    • 4 carrots, chopped
    • 2 onions, quartered
    • 3 parsnips, chopped
    • 4–5 small potatoes, halved

    Recipe

    Step 1: Preheat

    Heat the oven to 200°C (180°C fan).

    Step 2: Prepare the Chicken

    Pat the chicken dry with kitchen paper (crispy skin starts here). Rub all over with olive oil or butter, then season generously with salt and pepper.

    Step 3: Stuff for Flavour

    Place the lemon halves, garlic bulb, and herbs inside the cavity. This infuses the chicken with fragrance as it roasts.

    Step 4: Roast

    Place the chicken breast-side up in a roasting tin. Scatter optional vegetables around the bird for a built-in side dish. Roast for about 1 hour 20 minutes (20 minutes per 500 g plus 20 minutes extra), basting occasionally.

    Step 5: Check for Doneness

    The chicken is ready when the juices run clear from the thickest part of the thigh (or use a meat thermometer – it should read 75°C).

    Step 6: Rest

    Transfer to a board and cover loosely with foil. Let rest for 15 minutes before carving — this keeps the meat juicy.

    Tips for Success

    • Extra crispy skin: Rub a little salt under the skin before roasting.
    • Flavour boost: Add a splash of white wine or chicken stock to the roasting tin.
    • Herb butter variation: Mix chopped herbs and garlic into softened butter and rub under the skin.
    • Make it seasonal: Add wedges of butternut squash or apples to the roasting tin for an autumn twist.

    Serving Suggestions

    Pair with roasted root vegetables, creamy mashed potatoes, or even a fresh autumn salad. Don’t forget the gravy – use the pan juices for the richest flavour.

    Leftover Magic

    A roast chicken keeps on giving:

    • Sandwiches with homemade mayonnaise or chutney.
    • Chicken soup for cosy lunches.
    • Pie filled with mushrooms and cream.
    • Salads with roasted squash and pumpkin seeds.

    Final Thoughts

    Roast chicken is more than a meal – it’s a ritual of comfort, warmth, and togetherness. Simple to prepare yet full of flavour, it’s a dish you’ll return to again and again, especially when autumn nights call for hearty food and homely traditions.

  • Homemade Toffee Apples: A Sweet Autumn Treat

    Homemade Toffee Apples: A Sweet Autumn Treat

    There’s something nostalgic about biting into a glossy, crunchy toffee apple on a crisp autumn evening. Whether it’s childhood memories of funfairs, Bonfire Night, or Halloween parties, this treat is as timeless as it is delicious. Making them at home is easier than you think — and the result is a tray of shiny, jewel-like apples ready to delight kids and grown-ups alike.

    Why You’ll Love Toffee Apples

    • Perfect for autumn celebrations – Bonfire Night, Halloween, or just a cosy weekend.
    • Fun to make – especially with kids (carefully supervised around the hot toffee).
    • Simple ingredients – no fancy equipment needed, just everyday staples.
    • Customisable – roll them in nuts, sprinkles, or chocolate drizzle for extra fun.

    Ingredients (Makes 8)

    • 8 small, firm apples (Granny Smiths or Braeburn work well)
    • 400 g caster sugar
    • 100 ml water
    • 1 teaspoon white vinegar
    • 4 tablespoons golden syrup
    • Wooden sticks or skewers

    Instructions

    Step 1: Prepare the Apples

    Wash and dry the apples thoroughly (any waxy coating can stop the toffee sticking). Insert wooden sticks firmly into the core of each apple.

    Step 2: Make the Toffee

    In a heavy-based saucepan, add the sugar and water. Heat gently until the sugar dissolves. Stir in the vinegar and golden syrup, then bring to a boil without stirring.

    Step 3: Test the Toffee

    Boil until the mixture reaches 150°C (hard crack stage). You can test by dropping a little into cold water — it should harden and break easily.

    Step 4: Coat the Apples

    Carefully dip each apple into the toffee, swirling to coat evenly. Let the excess drip off, then place on a sheet of baking parchment to set.

    Step 5: Cool and Enjoy

    Leave to harden completely before serving.

    Variations & Toppings

    • Nutty crunch: Roll the coated apples in crushed peanuts or almonds.
    • Fun sprinkles: Add hundreds and thousands for a colourful twist.
    • Chocolate lovers: Drizzle with melted white or dark chocolate once set.
    • Spiced toffee: Add a pinch of cinnamon or ginger to the syrup for an autumnal flavour.

    Tips for Success

    • Use small apples — easier to coat and less heavy once dipped.
    • Keep a bowl of iced water nearby to test the toffee stage.
    • Work quickly once the toffee is ready, as it sets fast!
    • Always supervise children closely — the toffee is extremely hot.

    Serving Ideas

    Serve toffee apples as a festive party treat, wrap them in cellophane for gifts, or enjoy them simply with a mug of spiced apple tea by the fire. They’re the perfect balance of crisp fruit and sweet indulgence, capturing the very essence of autumn. 

  • Creating a Cosy Farmhouse Living Space for Autumn

    Creating a Cosy Farmhouse Living Space for Autumn

    As the days grow shorter and the air turns crisp, our homes become a sanctuary from the outside world. Autumn is the perfect time to refresh your spaces with warm textures, rustic touches, and soft lighting that invite you to slow down and savour the season. Whether it’s curling up in the lounge, gathering in the dining area, or welcoming guests in the hallway, here are some tips to bring cosy farmhouse charm into your home this fall.

    The Lounge: Your Autumn Retreat

    The lounge is often where we unwind — reading a book, sipping hot chocolate, or catching up with family. For an autumnal farmhouse feel:

    • Layer textures: Think chunky knit throws, plaid cushions, and faux fur blankets draped over sofas and chairs.
    • Warm colour palette: Deep rust, mustard yellow, and earthy browns instantly bring autumn indoors.
    • Natural accents: Add wicker baskets for extra blankets, a reclaimed wood coffee table, or a bowl filled with pinecones.
    • Soft lighting: Swap bright overhead lights for warm table lamps, fairy lights, or candles in lanterns.

    Personal touch: Keep a basket by the sofa with your favourite seasonal reads and a blanket – ready for cosy evenings.

    The Dining Area: Gather and Feast

    Autumn is the season of comfort food and long dinners with loved ones. Transform your dining space with these farmhouse-inspired ideas:

    • Rustic table setting: Use a linen runner, mismatched crockery, and wooden boards for a casual, welcoming feel.
    • Nature on the table: Decorate with mini pumpkins, dried flowers, or a simple bowl of seasonal fruits like apples and pears.
    • Ambient lighting: Candlesticks or hurricane lanterns in the centre of the table create a soft, flickering glow.
    • Warm textures: Add chair cushions in plaid or neutral tones, and layer in woven placemats for rustic charm.

    Personal touch: Set aside a special corner of the dining area for a seasonal display – a tray with candles, a jug of dried flowers, and perhaps a pumpkin or two.

    The Hallway: A Warm Welcome

    The hallway sets the tone for your home. Make it feel inviting as soon as the door opens:

    • Seasonal wreath: A wreath made of dried leaves, berries, or wheat gives instant autumn charm.
    • Entryway bench: Add a cosy cushion or plaid throw to a wooden bench for both practicality and style.
    • Storage with style: Use wicker baskets for shoes, scarves, or umbrellas – practical yet farmhouse chic.
    • Subtle scent: A bowl of dried orange slices, cinnamon sticks, and cloves adds both decoration and a natural fragrance.

    Personal touch: Place a framed autumn quote or seasonal print near the door — a little detail that greets guests (and you!) with warmth.

    Final Thoughts

    Cosy farmhouse décor doesn’t need to be complicated or expensive. With just a few simple touches — warm colours, natural textures, and seasonal accents — you can create a home that feels like an autumn retreat. Whether you’re curling up in the lounge, gathering in the dining room, or welcoming friends in the hallway, these spaces will wrap everyone in comfort and seasonal charm.

  • Creamy Butternut Squash Soup: A Bowl of Autumn Comfort

    Creamy Butternut Squash Soup: A Bowl of Autumn Comfort

    As the days grow shorter and the evenings chillier, there’s nothing more comforting than a steaming bowl of soup. Butternut squash soup is a true autumn classic – smooth, slightly sweet, and deeply warming. It’s the kind of recipe that feels just as at home on a weeknight table as it does at a festive gathering.

    Why You’ll Love This Soup

    • Simple ingredients, big flavour – no fuss, just wholesome goodness.
    • Velvety texture – blending the roasted squash makes it irresistibly creamy.
    • Make ahead friendly – perfect for batch cooking and freezing.
    • Endlessly versatile – dress it up with toppings or keep it rustic and simple.

    Ingredients (Serves 4–6)

    • 1 large butternut squash (about 1.2 kg), peeled, deseeded, and cubed
    • 2 tablespoons olive oil
    • 1 onion, chopped
    • 2 carrots, chopped
    • 2 garlic cloves, minced
    • 1 litre vegetable stock (or chicken stock)
    • 1 teaspoon ground cumin (optional, for warmth)
    • Salt and black pepper, to taste
    • 120 ml double cream (or coconut milk for dairy-free)

    Optional Garnishes:

    • A swirl of cream or yogurt
    • Pumpkin seeds, toasted
    • Fresh thyme or parsley

    Instructions

    1. Roast the Squash (Optional for Extra Flavour):
      Toss cubed squash with 1 tablespoon olive oil, salt, and pepper. Roast at 200°C for 25–30 minutes until golden and tender.
    2. Cook the Base:
      In a large pot, heat the remaining olive oil. Sauté onion, carrots, and garlic until softened (about 5 minutes).
    3. Add the Squash & Stock:
      Stir in roasted squash (or raw if skipping roasting), cumin (if using), and stock. Bring to a simmer and cook for 20 minutes until everything is tender.
    4. Blend Until Smooth:
      Use a hand blender or transfer to a blender in batches until silky smooth.
    5. Finish with Cream:
      Stir in cream or coconut milk, season to taste, and reheat gently.
    6. Serve:
      Ladle into bowls, garnish with cream, pumpkin seeds, or herbs, and serve with crusty farmhouse loaf.

    Tips & Variations

    • Make it vegan: Use coconut milk instead of cream and vegetable stock.
    • Add spice: A pinch of chili flakes or cayenne pepper gives a gentle heat.
    • Herb twist: Sage and thyme pair beautifully with the natural sweetness of squash.
    • Batch cooking: Freeze in portions for up to 3 months — perfect for quick autumn meals.

    Serving Suggestions

    Pair this soup with warm buttered bread, a grilled cheese sandwich, or a leafy autumn salad for a cosy, satisfying meal. It’s ideal for Sunday lunches, dinner parties, or simply warming up after a walk in the crisp autumn air.

  • The Art of Seasonal Decorating: Bringing Autumn Indoors

    The Art of Seasonal Decorating: Bringing Autumn Indoors

    Autumn is the season of slowing down, savoring the cosy moments and embracing change as we enter another season. The trees turn golden and the evenings draw in, and there is nothing better than creating a home that reflects the warmth of the season. 

    The best part? Seasonal decorating does not need to be complicated or overwhelming. With a few thoughtful touches, you can bring autumn indoors and make your space glow with cosy charm. 

    Frame Your Windows with Nature

    Garlands of autumn leaves instantly transform a room. Drape them around windows, mantels or doorways and weave in fairy lights for a magical glow at night. 

    Layer in the Pumpkins 

    Pumpkins aren’t just for Halloween. They are timeless autumn accents. Mix the sizes and the textures: classic oranges, white ghost pumpkins, or small striped gourds. Cluster them on counters, side boards, shelves or as a table centrepiece. 

    Add a Glow with Candles 

    As daylight fades earlier, candles make your home feel warm and inviting. Mix different heights and styles – tea lights in glass jars, pillar candles on trays, or scented candles for the cosy aroma.

    Bring the Outside In with Greenery

    Balance the warm tones of autumn with touches of fresh greenery. Potted herbs like rosemary, thyme or sage not only look decorative but are also perfect for seasonal cooking. Place them by windows or in rustic terracotta pots. 

    Swap in Seasonal Textiles

    Small changes in fabrics can shift the whole feeling of a space. Try a linen dish towel with autumn prints, a plaid throw on a chair or a rustic table runner. Textiles add texture, warmth and seasonal charm without a full redecoration. 

    Pro Tip: Think Layers

    The secret to seasonal decorating is layering – light, texture and natural elements. Start with one or two changes, like a garland and a pumpkin display, and build gradually. You do not need to fill every surface – just a few thoughtful details can transform the feel of a room. 

    Create Autumn Rituals in Your Home

    Decorating isn’t only about how your home looks – it is about how it feels. Light a candle as the sun sets, brew a cup of spiced apple tea, or bake something that fills the kitchen with cinnamon. These rituals paired with seasonal decoration make autumn feel truly special.

  • Homemade Pumpkin Spice Latte: Cosy Autumn in a Mug

    Homemade Pumpkin Spice Latte: Cosy Autumn in a Mug

    When the leaves start to fall and the mornings turn crisp, nothing says autumn quite like a pumpkin spice latte. Instead of heading to the café, why not make this seasonal favourite at home? It is surprisingly simple, tastes even better when made fresh, and fills your kitchen with warm cosy aromas. 

    Why Make it at Home?

    • Healthier & Customisable: Control the sweetness, spice and type of milk.
    • Budget Friendly: Café style luxury at a fraction of the price.
    • Authentic Flavour: Real pumpkin purée makes it richer than store bought syrups.

    Ingredients (Makes 2 Lattes)

    • 480ml milk (dairy or plant-based)
    • 60ml freshly brewed espresso 
    • 2 tablespoons pumpkin purée (see below how to make it)
    • 2 tablespoons maple syrup
    • ½ teaspoon pumpkin pie spice (mix of cinnamon, nutmeg, ginger and cloves)
    • ½ teaspoon vanilla extract
    • Whipped cream (optional, for topping)
    • Extra cinnamon or pumpkin pie spice (for garnish)

    How to Make Pumpkin Purée at Home

    If you cannot find canned pumpkin, making your own is easy.

    Step 1: Choose the Right Pumpkin

    Small sugar pumpkins or pie pumpkins work best. Avoid large carving pumpkins, which are watery and stringy.

    Step 2: Prepare

    Cut the pumpkin in half, scoop out the seeds and stringy bits.

    Step 3: Roast

    Place the halves cut-side down on a baking tray and roast at 180°C for 40-50 minutes, until the flesh is tender.

    Step 4: Scoop & Blend

    Once slightly cooled, scoop out the flesh and blend until smooth.

    Step 5: Store

    Keep in the fridge for up to 5 days or freeze in portions for up to 3 months.

    Tip: If the purée is watery, strain it through a cheesecloth or sieve for a thicker consistency. 

    Instructions for Pumpkin Spice Latte

    Step 1: Make the Pumpkin Base

    1. In a small saucepan, whisk together the milk, pumpkin purée, pumpkin pie spice and maple syrup.
    2. Heat gently over a medium heat until steaming, but do not boil.

    Step 2: Add Vanilla

    Stir in vanilla extract for extra warmth and depth.

    Step 3: Froth the Milk Mixture

    Use a milk frother, immersion blender, or whisk to create a light foam.

    Step 4: Pour Over Coffee

    1. Divide freshly brewed espresso between two mugs.
    2. Pour the pumpkin spiced milk over the coffee.

    Step 5: Finish with Toppings

    Top with whipped cream and a sprinkle of cinnamon or pumpkin spice. 

    Tips for Personalising Your Pumpkin Spice Latte 

    • Make it Vegan: Use oat or almond milk and skip the whipped cream or use a dairy free version.
    • Stronger Coffee Flavour: Use an extra shot of espresso.
    • Extra Cosy: Add a cinnamon stick or drizzle of caramel on top.
    • Batch Prep: Mix a big batch of the pumpkin base and store in the fridge for up to 3 days. Just heat, froth and pour over coffee when needed.

    Serving Suggestion

    Pair your homemade pumpkin spice latte with a slice of pumpkin bread, a farmhouse loaf toasted with butter, or a cosy autumnal breakfast. It’s like wrapping yourself in a blanket and sipping fall in a cup. 

    My Autumn Coffee Bar Favourites

    Pumpkin Leaves Ceramic Mug ~ £11.95 Shop Here

    Double Walled Coffee Glass ~ £16.99 Shop Here

    Country Living Hedgehog Mug ~ £11.95 Shop Here


    Affiliate Disclaimer

    This post contains affiliate links, which means I may earn a small commission if you decide to buy something I’ve recommended — but don’t worry, it won’t cost you a penny more. I only ever share products I love and that help make autumn days a little cosier (and coffee moments a lot more special!).

  • Creamy Indulgent Hot Chocolate: Comfort in a Drink

    Creamy Indulgent Hot Chocolate: Comfort in a Drink

    As the nights draw in and leaves crunch underfoot, nothing feels quite as comforting as a steaming mug of hot chocolate. Rich, velvety, and topped with a swirl of cream, this winter indulgence is more than a drink – it’s a hug in a mug.

    Why Homemade Hot Chocolate?

    • Richer flavor – Made with real chocolate, not powder.
    • Customisable – Adjust sweetness, add spices, or make it dairy-free.
    • Seasonal comfort – Perfect for winter evenings, bonfire nights, or rainy days.

    Ingredients (Serves 2)

    • 500 ml whole milk (or oat milk for dairy-free creaminess)
    • 100 g good-quality dark chocolate (around 70%), chopped
    • 2 tablespoons cocoa powder
    • 2 tablespoons sugar (adjust to taste)
    • ½ teaspoon vanilla extract
    • Pinch of salt

    Optional Toppings:

    • Whipped cream
    • Marshmallows
    • Chocolate shavings
    • A dusting of cinnamon or nutmeg

    Instructions

    Step 1: Warm the Milk

    Gently heat the milk in a saucepan until steaming but not boiling.

    Step 2: Whisk in Chocolate & Cocoa

    1. Add chopped chocolate, cocoa powder, and sugar. 
    2. Whisk until smooth and melted.

    Step 3: Finish with Vanilla

     Stir in vanilla extract and a pinch of salt for depth.

    Step 4: Serve

    Pour into mugs and top with whipped cream, marshmallows, or a sprinkle of spice.


    Variations for Extra Indulgence

    • Spiced Hot Chocolate: Add a cinnamon stick and a pinch of nutmeg while heating.
    • Salted Caramel Twist: Stir in 1 tablespoon caramel sauce and a tiny pinch of sea salt.
    • Mocha Style: Replace 100 ml of the milk with strong coffee for a chocolatey latte.
    • Chilli Kick: Add a tiny pinch of cayenne pepper for a Mexican hot chocolate vibe.

    Serving Suggestions

    Pair your hot chocolate with cinnamon rolls, a slice of pumpkin pie, or even just a blanket and a good book. This is the kind of indulgence winter weekends are made for. 

  • Homemade Cinnamon Rolls: Soft, Sweet & Perfectly Spiced

    Homemade Cinnamon Rolls: Soft, Sweet & Perfectly Spiced

    Few things are as comforting as the aroma of cinnamon rolls baking in the oven. Soft, pillowy dough whirled with buttery cinnamon sugar and topped with a luscious glaze – it is the ultimate treat for chilly mornings, brunch gatherings or simply when you need a little extra cosiness.

    Why You’ll Love This Recipe

    • Soft & Fluffy: The dough bakes into tender, melt-in-your-mouth rolls. 
    • Richly Spiced: A buttery cinnamon filling gives that warm, autumnal flavour.
    • Perfect for Sharing: Bake a panful and watch them disappear in minutes. 

    Ingredients (Makes 12 Rolls)

    For the Dough:

    • 500g strong white bread flour
    • 7g instant yeast
    • 75g sugar
    • 1 teaspoon salt
    • 240ml warm milk
    • 75g unsalted butter, melted
    • 2 large eggs

    For the Filling:

    • 100g unsalted butter, softened 
    • 200g light brown sugar
    • 2 tablespoons ground cinnamon

    For the Glaze:

    • 120g icing sugar 
    • 2-3 tablespoons milk
    • ½ teaspoon vanilla extract

    Instructions

    Step 1: Make the Dough

    1. In a bowl, mix warm milk, sugar and yeast. Let this sit for 5 minutes until foamy.
    2. Add melted butter, eggs and salt, then mix in flour gradually.
    3. Knead by hand or with a dough hook for 8-10 minutes until smooth and elastic.
    4. Place in a greased bowl, cover and let it rise 1-2 hours until it has doubled in size.

    Step 2: Shape the Rolls

    1. Roll dough into a rectangle (approx. 35 x 25 cm).
    2. Spread softened butter evenly over the surface.
    3. Mix brown sugar and cinnamon, then sprinkle generously over butter.
    4. Roll up tightly from the long edge into a log.
    5. Slice into 12 even pieces and place in a greased baking dish.

    Step 3: Second Rise

    1. Cover and let rise another 30-45 minutes until puffy.
    2. Preheat the oven to 180°C.

    Step 4: Bake

    Bake for 20-25 minutes until golden brown.

    Step 5: Glaze

    1. Mix icing sugar, milk and vanilla to form a smooth glaze.
    2. Drizzle over warm rolls before serving.

    Tips for Perfect Cinnamon Rolls

    • Make Ahead: Prepare the rolls the night before, cover and refrigerate. Let them come to room temperature and rise before baking in the morning.
    • Extra Gooey: Pour a little cream over the rolls before baking for a richer texture.
    • Add-Ins: Sprinkle chopped pecans, raisins or apple pieces with the cinnamon sugar.
    • Frosting Swap: Cream cheese frosting is a delicious alternative to glaze.

    Serving Suggestions

    Enjoy warm from the oven with a hot coffee, spiced apple tea or a pumpkin spice latte. These rolls are pure comfort food and perfect for autumn and winter gatherings.

  • Classic Pumpkin Pie: A True Taste of Autumn

    Classic Pumpkin Pie: A True Taste of Autumn

    When autumn rolls around, nothing feels quite as festive as a freshly baked pumpkin pie. With its velvety spiced filling and buttery crust, this pie captures the essence of fall in every slice. Whether you are planning a cosy Sunday bake, a seasonal gathering or a festive holiday table, pumpkin pie is a timeless favourite.

    Why Pumpkin Pie is an Autumn Essential

    • Seasonal Flavours: Pumpkin, cinnamon, nutmeg and cloves are the epitome of fall flavours.
    • Simple to Make: Just a pie crust, blended filling and a bit of patience while it bakes.
    • Perfect for Sharing: Serve with whipped cream or ice cream for the ultimate autumn treat.

    Ingredients (1 Standard 23cm/ 9 inch Pie)

    For the Pie Crust (or use store bought): 

    • 250g plain flour
    • 125g cold butter, cubed
    • 1 tablespoon sugar
    • Pinch of salt
    • 3-4 tablespoons cold water

    For the Pumpkin Filling: 

    • 425g pumpkin purée (canned or homemade)
    • 2 large eggs + 1 egg yolk
    • 150g soft brown sugar
    • 1 teaspoon ground cinnamon
    • ½ teaspoon ground nutmeg
    • ½ teaspoon ground ginger
    • ¼ teaspoon ground cloves
    • Pinch of salt
    • 240ml evaporated milk (or double cream for a richer version)

    How to Make Pumpkin Purée (If Not Using Canned)

    1. Use a small sugar or pie pumpkin. Cut in half and scoop out the seeds.
    2. Roast cut-side down at 180°C for 40-50 minutes until tender.
    3. Scoop out the flesh and blend until smooth.

    Tip: Strain through cheesecloth if watery.

    Instructions

    Step 1: Make the Crust

    1. Mix flour, sugar and salt. Rub in butter until crumbly.
    2. Add cold water gradually, mixing until the dough comes together. 
    3. Wrap in clingfilm and chill for 30 minutes.
    4. Roll out and line a 23cm pie dish. Trim edges.

    Step 2: Make the Filling

    1. In a bowl, whisk together pumpkin purée, eggs, sugar, spices and salt.
    2. Gradually whisk in evaporated milk (or cream) until smooth.

    Step 3: Assemble & Bake

    1. Preheat the oven to 200°C.
    2. Pour filling into pie crust.
    3. Bake at 200°C for 15 minutes, then reduce to 175°C and bake for 40-50 minutes, until filling is set but slightly wobbly in the centre. 
    4. Cool completely before slicing.

    Tips for the Perfect Pumpkin Pie

    • Blind Bake the Crust: Line with parchment, add baking beans and bake for 15 minutes before adding the filling. This gives the pie extra crispiness.
    • Check Doneness: The pie should jiggle slightly in the middle but not be liquid. It will set as it cools.
    • Spice Blend Swap: Use 1 1⁄2 teaspoons pumpkin spice if you prefer a shortcut.
    • Make Ahead: Pumpkin pie tastes even better the next day – perfect for the holidays. 

    Serving Suggestions

    Serve with freshly whipped cream, a drizzle of caramel sauce, or a dusting of cinnamon. For a rustic touch, garnish with sugared pecans or a sprinkle of pumpkin seeds.