Category: Autumn Edition

  • Whipped Feta with Thyme: A Creamy, Savoury Dip for Cosy Evenings & Seasonal Sharing

    Whipped Feta with Thyme: A Creamy, Savoury Dip for Cosy Evenings & Seasonal Sharing

    As the seasons turn and we spend more time gathered indoors, simple sharing dishes become a quiet joy. Whipped feta with thyme is one of those recipes – effortlessly elegant, deeply comforting, and perfect for relaxed autumn and winter moments.

    Salty feta whipped until light and creamy, softened with yoghurt and olive oil, then finished with fragrant thyme… it’s a dip that feels rustic yet refined. Ideal for grazing boards, cosy evenings with friends, or slow weekends when you want something savoury without fuss.

    Why Whipped Feta Works So Well in Cooler Months

    This dip has everything we crave as the weather cools:

    • Creaminess that feels indulgent and comforting
    • Saltiness that pairs beautifully with bread and roasted vegetables
    • Herbs that add warmth and earthiness
    • Simplicity – just a few good ingredients

    Thyme, in particular, brings a gentle, woodsy note that feels perfectly in tune with autumn and winter cooking.

    Ingredients

    Serves: 4–6 as a dip

    • 200 g feta cheese
    • 100 g Greek yoghurt
    • 2–3 tbsp olive oil
    • 1 small garlic clove (optional, finely grated)
    • 1 tsp fresh thyme leaves (or ½ tsp dried)
    • Freshly ground black pepper

    To finish (optional):

    • Extra drizzle of olive oil
    • A few fresh thyme sprigs
    • Pinch of chilli flakes or lemon zest

    Recipe

    Step 1: Whip the Feta

    Add the feta, Greek yoghurt, olive oil, garlic (if using), thyme, and black pepper to a food processor.

    Blend until smooth, light, and creamy.
    Scrape down the sides if needed and blend again until fully whipped.

    Step 2: Taste & Adjust

    Taste the dip and adjust seasoning if needed – feta is naturally salty, so extra salt is rarely required.

    Step 3: Serve

    Spoon the whipped feta into a shallow bowl.
    Swirl gently with the back of a spoon and finish with olive oil, thyme, and any optional toppings.

    Serve at room temperature for the best flavour and texture.

    How to Serve Whipped Feta with Thyme

    This dip is wonderfully versatile and suits so many cosy occasions. Serve it with:

    • Warm crusty bread or sourdough
    • Toasted pita or flatbreads
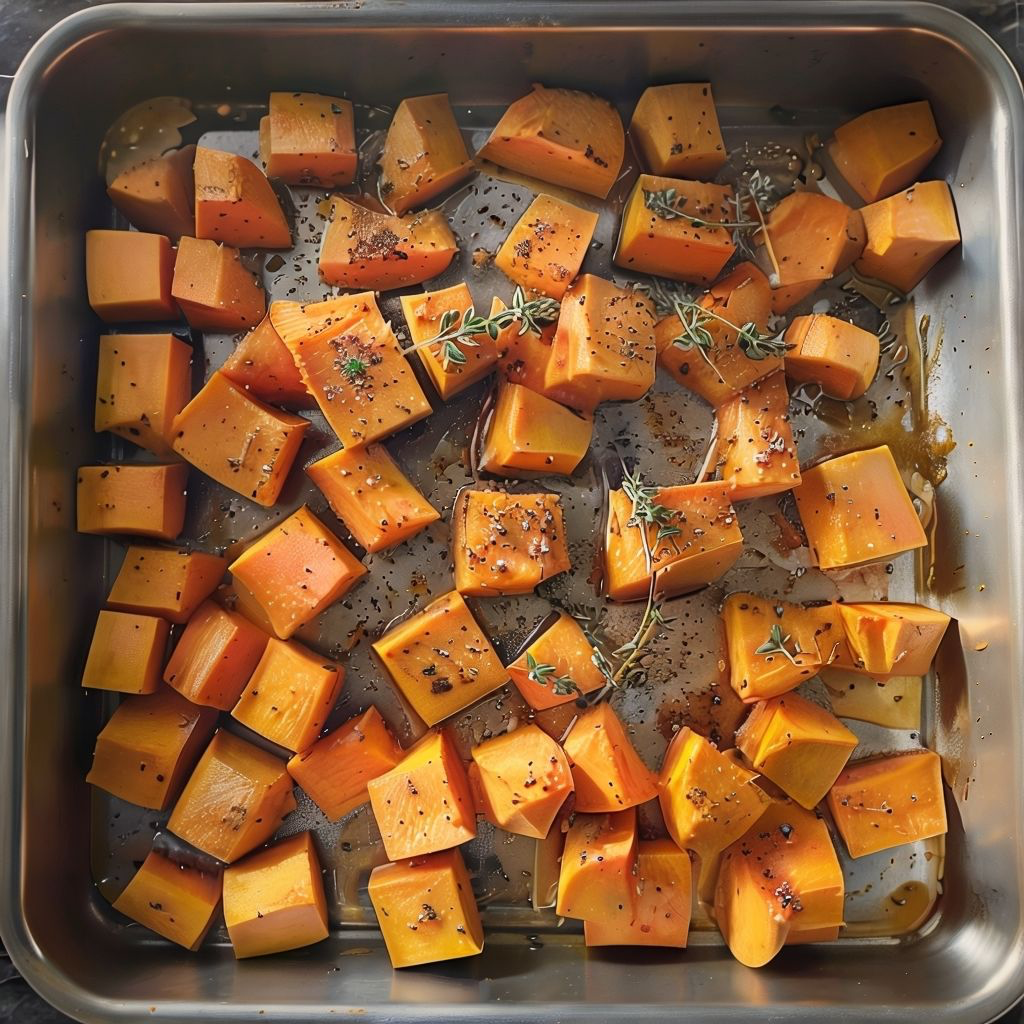
    • Roasted vegetables (carrots, squash, beetroot)
    • Crackers or oatcakes
    • Olives and marinated vegetables
    • As part of a seasonal grazing board

    It also works beautifully spread onto toast and topped with roasted tomatoes or honeyed nuts.

    Seasonal Variations

    • Honey & Thyme: Drizzle with honey for a sweet–salty contrast
    • Lemon & Herb: Add lemon zest for brightness
    • Roasted Garlic: Swap raw garlic for roasted for softness
    • Chilli & Thyme: Add gentle heat for winter evenings
    • Olive Oil & Black Pepper: Keep it simple and classic

    Each variation keeps the base cosy and comforting.

    Create a Cosy Sharing Moment

    Whipped feta with thyme is perfect for those slow, intimate moments:

    • Candlelit evenings
    • Board game nights
    • Fireside snacks
    • Casual gatherings with friends
    • Quiet weekends with a glass of wine

    Set it in the centre of the table, add warm bread, and let everyone help themselves.

    Final Thoughts

    Whipped feta with thyme is one of those recipes that feels quietly special – simple ingredients transformed into something comforting, elegant, and perfect for the slower pace of autumn and winter.

    Serve it softly whipped, generously drizzled, and enjoyed slowly – a little bowl of seasonal savoury comfort. 

  • Savoury Parmesan Popcorn: A Simple, Comforting Autumn Snack for Cosy Evenings

    Savoury Parmesan Popcorn: A Simple, Comforting Autumn Snack for Cosy Evenings

    As the evenings draw in and the air turns cooler, autumn becomes the season of simple pleasures – soft lighting, favourite films, warm blankets, and comforting snacks made at home. Homemade savoury popcorn with Parmesan is one of those easy, satisfying treats that feels just right for this time of year.

    Light, crisp popcorn tossed with melted butter, salty Parmesan, and a hint of seasoning is unfussy, comforting, and perfect for sharing. It’s the kind of snack you make while the kettle boils or a film queues up – simple, warming, and quietly indulgent.

    Why Popcorn Is Perfect for Autumn

    Popcorn is a brilliant autumn snack because it’s:

    • quick and easy to make
    • warm and comforting straight from the pan
    • light yet satisfying
    • perfect for cosy nights in
    • ideal for sharing during movie or game nights

    Adding Parmesan turns it into something savoury and seasonal – rich, salty, and wonderfully moreish.

    Ingredients (serves: 2–3 as a snack)

    • 75 g popcorn kernels
    • 2 tbsp olive oil or butter (for popping)
    • 30 g finely grated Parmesan cheese
    • 2 tbsp melted butter
    • Freshly ground black pepper
    • Optional extras:
      • pinch of garlic powder
      • pinch of smoked paprika
      • dried thyme or rosemary
      • pinch of chilli flakes

    Recipe

    Step1: Pop the Corn

    Heat the olive oil or butter in a large, deep pan with a lid over medium heat.
    Add a few kernels to test – once they pop, add the remaining kernels and cover.

    Shake the pan gently as the popcorn pops to prevent burning.
    Once popping slows, remove from the heat and pour into a large bowl.

    Step 2: Add Butter & Cheese

    Drizzle the melted butter over the warm popcorn and toss gently to coat.
    Sprinkle over the finely grated Parmesan while the popcorn is still warm so it melts slightly and sticks.

    Step 3: Season

    Add black pepper and any optional seasonings.
    Taste and adjust – Parmesan adds saltiness, so extra salt may not be needed.

    Step 4: Serve Warm

    Serve immediately while still warm and fragrant.

    Autumn Flavour Variations

    • Garlic & Parmesan: add garlic powder for depth
    • Herb & Parmesan: thyme or rosemary for a rustic feel
    • Smoked Paprika Parmesan: warm and autumnal
    • Chilli Parmesan: gentle heat for cosy evenings
    • Butter & Black Pepper: simple and classic

    Each variation keeps that comforting savoury balance perfect for autumn.

    When to Enjoy Savoury Popcorn

    This Parmesan popcorn is ideal for:

    • autumn movie nights
    • board game evenings
    • quiet nights with a book
    • casual get-togethers
    • an afternoon snack after a crisp walk
    • a lighter alternative to heavier autumn nibbles

    It pairs beautifully with hot drinks, sparkling water, or a cosy evening glass of something warm.

    Create a Cosy Autumn Moment

    Make this snack when:

    • the house feels calm and quiet
    • lamps are on instead of overhead lights
    • blankets are ready on the sofa
    • rain taps softly at the window
    • you want something comforting without effort

    The gentle crackle of popping corn and the scent of melted butter instantly set the autumn mood.

    Final Thoughts

    Savoury Parmesan popcorn is autumn snacking at its simplest – warm, crunchy, and deeply comforting. It’s proof that the best seasonal treats don’t need to be complicated; sometimes all you need is a bowl, a film, and a quiet evening at home.

    Pop, sprinkle, and enjoy the cosy moments that follow. 

  • Cheesy Potato Skins: A Crispy, Comforting Autumn Snack for Cosy Evenings

    Cheesy Potato Skins: A Crispy, Comforting Autumn Snack for Cosy Evenings

    As autumn settles in and the evenings grow darker, there’s something especially comforting about simple, hearty snacks fresh from the oven. Cheesy potato skins are the perfect autumn treat – crisp on the outside, soft in the middle, and generously topped with melted cheese that bubbles and browns just enough to feel indulgent.

    They’re rustic, warming, and wonderfully unfussy. Ideal for slow weekends, movie nights on the sofa, or sharing around the table with family and friends, cheesy potato skins feel like proper autumn comfort food.

    Why Potato Skins Are Perfect for Autumn

    Potatoes are at their best in the cooler months – earthy, filling, and deeply satisfying. When baked and crisped, then topped with cheese, they become the kind of snack that warms you from the inside out.

    Potato skins are:

    • cosy and hearty
    • easy to make with simple ingredients
    • perfect for sharing
    • comforting without being complicated
    • ideal for autumn evenings at home

    They’re also a lovely way to use up leftover baked potatoes.

    Ingredients (Serves: 2–3 as a snack)

    • 4 large baking potatoes
    • 1 tbsp olive oil
    • Salt and black pepper
    • 100 g grated cheddar (or a mix of cheddar and mozzarella)
    • Optional toppings:
      • spring onions, finely sliced
      • cooked bacon pieces or veggie alternative
      • sour cream or crème fraîche
      • chives or parsley

    Recipe

    Step 1: Bake the Potatoes

    Preheat your oven to 200°C (fan).
    Scrub the potatoes, prick with a fork, and bake directly on the oven shelf for 50–60 minutes, until tender inside and crisp on the outside.

    Step 2: Prepare the Skins

    Allow the potatoes to cool slightly, then slice each one in half lengthways.
    Scoop out most of the fluffy centre, leaving a thin layer of potato inside the skin.

    (Save the scooped potato for mash, soups, or fishcakes.)

    Step 3: Crisp the Skins

    Brush the potato skins with olive oil and season with salt and pepper.
    Place skin-side down on a baking tray and return to the oven for 10–15 minutes, until crisp.

    Step 4: Add the Cheese

    Sprinkle the grated cheese generously into each skin.
    Add any optional toppings at this stage.

    Step 5: Melt & Serve

    Bake for a further 8–10 minutes, until the cheese is melted and golden.
    Finish with spring onions, herbs, or a dollop of sour cream if you like.

    Serve warm and enjoy immediately.

    How to Enjoy Cheesy Potato Skins

    These autumn snacks are perfect for:

    They pair beautifully with hot drinks or a simple side salad if you want something lighter.

    Autumn Variations

    • Cheddar & Chive: classic and comforting
    • Cheese & Bacon: rich and savoury
    • Cheese & Mushroom: earthy and autumnal
    • Spicy Cheese: add a pinch of paprika or chilli flakes
    • Blue Cheese & Walnut: for a deeper, seasonal flavour

    Each version keeps that cosy, autumn feel.

    Create a Cosy Autumn Moment

    Make cheesy potato skins on an evening when:

    • the house feels quiet and calm
    • the oven brings warmth to the kitchen
    • candles flicker nearby
    • blankets are ready on the sofa
    • you want something comforting without fuss

    They’re the kind of snack that turns an ordinary evening into a cosy autumn ritual.

    Final Thoughts

    Cheesy potato skins are autumn comfort food at its simplest – crisp, warm, and deeply satisfying. Whether shared with loved ones or enjoyed curled up on the sofa, they bring that familiar, homely feeling that makes autumn evenings so special.

    Bake, top, and enjoy the cosy moments that follow. 

  • Stewed Fruit with Yoghurt: A Gentle, Comforting Autumn Bowl for Slow Mornings & Evenings

    Stewed Fruit with Yoghurt: A Gentle, Comforting Autumn Bowl for Slow Mornings & Evenings

    As the days shorten and the air turns crisp, autumn invites us to soften our pace and return to simple, nourishing foods. Stewed fruit with yoghurt is one of those quietly comforting dishes – warm, lightly spiced fruit paired with cool, creamy yoghurt for a balance that feels just right at this time of year.

    It’s an ideal autumn staple: easy to make, endlessly adaptable, and perfect for breakfast, dessert, or a cosy afternoon snack. Whether enjoyed by a window on a misty morning or after dinner on a cool evening, this humble bowl feels grounding, soothing, and seasonal.

    Why Stewed Fruit Is Perfect for Autumn

    Autumn fruits come into their own when gently cooked. Apples, pears, plums, and berries soften beautifully, releasing natural sweetness and warmth.

    Stewing fruit:

    • brings out flavour without needing much sugar
    • creates a naturally comforting texture
    • fills the kitchen with gentle autumn aromas
    • makes fruit easier to digest
    • feels warming without being heavy

    Paired with yoghurt, it becomes a simple bowl of seasonal comfort.

    Ingredients (Serves: 2–3)

    • 3 apples or pears (or a mix), peeled and chopped
    • 1 handful of blackberries, plums, or berries (optional)
    • 1 tbsp honey or maple syrup (optional, to taste)
    • ½ tsp cinnamon
    • Pinch of nutmeg or mixed spice (optional)
    • 2 tbsp water
    • Natural yoghurt, Greek yoghurt, or plant-based yoghurt to serve

    Optional toppings:

    • Toasted oats or granola
    • Chopped nuts
    • Seeds
    • Extra drizzle of honey

    Recipe

    Step 1: Prepare the Fruit

    Add the chopped fruit, berries (if using), water, honey, and spices to a small saucepan.

    Step 2: Stew Gently

    Cook over a low heat for 10–15 minutes, stirring occasionally, until the fruit is soft and spoonable but still holds some shape.

    Step 3: Cool Slightly

    Remove from the heat and allow to cool just a little – warm fruit with cool yoghurt is part of the charm.

    Step 4: Serve

    Spoon the stewed fruit over bowls of yoghurt.
    Add toppings if desired and enjoy slowly.

    Serving Ideas

    Stewed fruit with yoghurt works beautifully in so many autumn moments:

    • Breakfast: with oats or granola
    • Afternoon snack: warm and comforting with a cup of tea
    • Light dessert: after a hearty autumn meal
    • Cosy supper: when you want something gentle
    • Meal prep: keep stewed fruit in the fridge for 3–4 days

    It’s a dish that adapts easily to your day.

    Autumn Fruit Variations

    • Apple & Cinnamon – classic and comforting
    • Pear & Ginger – gentle warmth and fragrance
    • Plum & Vanilla – rich and autumnal
    • Apple & Blackberry – nostalgic and seasonal
    • Mixed Orchard Fruits – perfect for using what you have

    Each version brings its own autumn character.

    Create an Autumn Moment

    This is the kind of food best enjoyed slowly. Try serving it when:

    • rain taps against the window
    • the kitchen feels warm and calm
    • you’re wrapped in a jumper
    • candles are lit nearby
    • the day feels unhurried

    Simple food, enjoyed mindfully, is one of autumn’s greatest comforts.

    Final Thoughts

    Stewed fruit with yoghurt is autumn in its gentlest form – warming without being heavy, sweet without being indulgent, and simple without feeling plain. It’s a reminder that seasonal comfort doesn’t need to be complicated.

    A bowl, a spoon, a quiet moment – and the soft sweetness of autumn fruit to enjoy. 

  • Homemade Pumpkin Soap & Bubble Bath: A Cosy, Seasonal Treat for Your Winter Self-Care Routine

    Homemade Pumpkin Soap & Bubble Bath: A Cosy, Seasonal Treat for Your Winter Self-Care Routine

    As winter settles in and chilly evenings call for warm baths and soft pyjamas, there’s something truly special about using homemade bath products. These pumpkin-inspired soap and bubble bath recipes bring the comforting scents of autumn and winter right into your bathroom – warm spices, creamy pumpkin tones, and a soft, cosy fragrance that feels like wrapping yourself in a blanket.

    And the best part? They’re simple, safe, and fun to make at home using melt-and-pour bases, natural colour, and gentle fragrance oils.

    Perfect for:

    • Cosy winter self-care nights
    • Handmade Christmas gifts
    • Hamper fillers
    • A touch of seasonal luxury

    Homemade Pumpkin Spice Soap

    Safe, melt-and-pour method – no lye, no complicated chemistry

    Makes: 6–8 small bars (depending on your mould size)

    Ingredients

    • 450 g melt-and-pour soap base (goat’s milk, shea butter, or glycerin)
    • 1 tsp pumpkin purée optional – for colour & creaminess
    • 1 tsp pumpkin spice mix (or cinnamon + ginger + nutmeg)
    • 10–15 drops pumpkin spice fragrance oil (skin-safe)
    • A pinch of mica powder in orange or gold (optional)
    • Silicone soap moulds

    Recipe

    Step 1: Melt the Base

    1. Cut the soap base into cubes and place in a heatproof jug.
    2. Microwave in 20–30 second bursts, stirring between each, until fully melted.

    Step 2: Add Pumpkin & Spice

    1. Stir in the pumpkin purée (just a small amount – too much can shorten shelf life).
    2. Add your pumpkin spice and mica powder.
    3. Mix gently until smooth.

    Step 3: Add Fragrance

    1. Add the pumpkin spice fragrance oil and stir again.

    Step 4: Pour & Set

    1. Pour the mixture into your silicone moulds.
    2. Tap gently to remove air bubbles.
    3. Allow to set for 2–4 hours, or overnight.

    When you pop them out, you’ll have beautiful, creamy pumpkin-scented bars perfect for gifting or winter pampering.


    Homemade Pumpkin Spice Bubble Bath

    Gentle, cosy, and perfect for winter baths

    Makes: 1 medium bottle (approx. 250 ml)

    Ingredients

    • 250 ml unscented bubble bath base (mild, SLS-free if preferred)
    • 1–2 tsp vegetable glycerin (optional – adds moisture)
    • 1 tsp pumpkin spice fragrance oil (skin-safe)
    • A few drops of orange or caramel liquid soap colourant (optional)
    • Sterile bottle or jar

    Recipe

    Step 1: Prepare Your Base

    1. Pour your bubble bath base into a mixing jug.
    2. Add the glycerin and mix gently.

    Step 2: Add Scent & Colour

    1. Add the pumpkin spice fragrance oil.
    2. Add colourant drop by drop until you reach a warm, pumpkin-like shade.
    3. Stir gently – avoid whisking so it doesn’t foam.

    Step 3: Bottle It

    1. Use a funnel to pour into your jar or bottle.
    2. Leave to settle for 24 hours so bubbles disperse.

    When ready, add a few tablespoons to a warm bath – the scent fills the room with cosy spice, perfect for cold winter evenings.


    Optional: Homemade Pumpkin Spice Mix (for soap)

    If you’d like to make your own spice blend:

    • 1 tbsp cinnamon
    • 1 tsp ginger
    • ½ tsp nutmeg
    • ½ tsp allspice or cloves

    Store in a small jar – it’s lovely for soaps, candles, or baking.

    Cosy Packaging & Gift Ideas

    These homemade creations make beautiful winter gifts. Try:

    • Paper labels
    • Twine or ribbon
    • Small wicker baskets
    • Dried orange slices or mini pinecones tucked alongside
    • Glass jars with handwritten tags

    Final Thoughts

    There’s something magical about making your own bath treats in winter – warm spices, soft colours, and that feeling of creating something comforting with your hands.

    Whether you keep these pumpkin soap and bubble bath goodies for yourself or gift them to someone special, they bring a cosy touch of autumn-winter warmth into the season.

    Soft candlelight, a warm bath, and the gentle scent of pumpkin spice…
    That’s winter self-care at its most comforting. 

  • Cranberry Upside-Down Cake: A Bright & Beautiful Taste of Autumn

    Cranberry Upside-Down Cake: A Bright & Beautiful Taste of Autumn

    There’s something so lovely about an upside-down cake – that little moment of suspense when you turn it out, followed by the reveal of glossy, jewel-like fruit glistening on top. This Cranberry Upside-Down Cake brings that magic to autumn baking, with its tangy berries, buttery sponge, and a hint of orange for warmth.

    It’s the kind of bake that feels both rustic and special – perfect for cosy gatherings, Sunday afternoons, or as a festive table dessert later in the season.

    Ingredients (Serves 8-10)

    For the Cranberry Layer:

    • 200 g fresh or frozen cranberries
    • 75 g light brown sugar
    • 1 tbsp orange juice
    • Zest of ½ an orange
    • 25 g butter

    For the Cake Batter:

    • 125 g unsalted butter, softened
    • 125 g caster sugar
    • 2 eggs
    • 1 tsp vanilla extract
    • 150 g self-raising flour
    • 50 g ground almonds (optional for a lovely texture)
    • 2 tbsp milk or orange juice

    Recipe

    Step 1: Prepare the Cranberry Topping

    1. Preheat the oven to 180°C (fan) and line the base of a round 20cm cake tin with baking parchment.
    2. In a small saucepan, melt the butter with the brown sugar and orange juice.
    3. Stir in the cranberries and orange zest, and cook gently for 3–5 minutes, just until the berries start to soften and the sugar forms a syrup.
    4. Pour the cranberry mixture into the base of the prepared tin and spread evenly.

    Step 2: Make the Cake Batter

    1. In a large bowl, cream together the butter and caster sugar until light and fluffy.
    2. Beat in the eggs one at a time, followed by the vanilla extract.
    3. Fold in the flour and ground almonds, alternating with the milk (or extra orange juice) until you have a smooth, thick batter.

    Step 3: Assemble & Bake

    1. Carefully spoon the cake batter over the cranberries and smooth the top.
    2. Bake for 30–35 minutes, or until a skewer inserted into the centre comes out clean.
    3. Allow to cool in the tin for 10 minutes, then run a knife around the edge and invert onto a serving plate.

    The glossy cranberry layer should be glistening and ruby red on top.

    Serving Suggestions

    • Serve warm with thick cream, Greek yoghurt, or vanilla ice cream.
    • A drizzle of warm custard turns it into a comforting pudding.
    • Sprinkle a little powdered sugar or orange zest on top for a festive touch.

    This cake looks stunning served on a rustic ceramic plate, surrounded by flickering candles and mugs of tea – an effortless yet beautiful autumn dessert.

    Tips & Variations

    • Make it spiced: Add a pinch of cinnamon or allspice to the cake batter for extra warmth.
    • Use other fruit: This recipe also works beautifully with pears, plums, or apples.
    • Make ahead: The cake keeps well for up to 3 days in an airtight container, and tastes even better the next day.
    • Gluten-free: Substitute a good-quality gluten-free self-raising flour and ensure the baking powder used is gluten-free.

    Final Thoughts

    This Cranberry Upside-Down Cake is a celebration of simple autumn baking – bright, buttery, and beautifully seasonal. The tart cranberries contrast perfectly with the soft sponge, and that glossy topping gives it a touch of rustic elegance.

    Serve it warm from the oven, when the syrup still glistens, and enjoy a slice with a cup of tea as the leaves fall outside – the very essence of autumn in every bite.

  • Butternut Squash Pasta: A Creamy, Comforting Taste of Autumn

    Butternut Squash Pasta: A Creamy, Comforting Taste of Autumn

    This butternut squash pasta is everything we love about autumn – cosy, golden, and full of flavour. The roasted squash brings a natural sweetness, the sauce is silky and rich without being heavy, and every bite feels like pure comfort in a bowl.

    It’s a simple, seasonal recipe that’s perfect for weeknight dinners, slow weekends, or sharing with friends around a rustic table.

    Ingredients (Serves 4)

    • 1 medium butternut squash (about 1 kg), peeled, deseeded, and cubed
    • 2 tbsp olive oil
    • Salt and black pepper, to taste
    • 2 garlic cloves, peeled
    • 1 small onion, chopped
    • 250 ml vegetable stock
    • 100 ml double cream or milk (for a lighter version)
    • 50 g grated Parmesan (plus extra for serving)
    • 1 tsp fresh thyme leaves (or ½ tsp dried)
    • 350 g pasta (tagliatelle, rigatoni, or penne work well)
    • Optional: a pinch of nutmeg for warmth

    Recipe

    Step 1: Roast the Squash

    1. Preheat your oven to 200°C (fan).
    2. Toss the cubed squash with 1 tbsp olive oil, salt, pepper, and thyme.
    3. Spread on a baking tray and roast for 25–30 minutes, until soft and golden.

    Add the garlic cloves to the tray halfway through roasting so they soften gently.

    Step 2: Cook the Pasta

    1. Bring a large pan of salted water to the boil.
    2. Cook the pasta according to the packet instructions until al dente.
    3. Reserve 100 ml of the pasta water, then drain.

    Step 3: Make the Sauce

    1. Heat 1 tbsp olive oil in a pan and gently cook the onion until soft and translucent.
    2. Add the roasted squash and garlic, then pour in the vegetable stock.
    3. Simmer for a few minutes, then transfer everything to a blender or use a hand blender if smooth is desired effect.
    4. Add the cream (or milk) and Parmesan to the blender, and blend until smooth and silky.
    5. Taste and season with salt, pepper, and a pinch of nutmeg if using.
    6. If the sauce feels too thick, stir in a little of the reserved pasta water to loosen.

    Step 4: Combine & Serve

    1. Toss the pasta in the sauce, adding a splash more pasta water if needed to coat evenly.
    2. Serve hot, sprinkled with extra Parmesan and black pepper.
    3. Garnish with fresh thyme or a drizzle of olive oil.

    Tips & Variations

    • Add greens: Stir in spinach or kale at the end for extra colour and nutrients.
    • Make it vegan: Use plant-based cream and nutritional yeast instead of Parmesan.
    • Add crunch: Top with toasted breadcrumbs or roasted seeds.
    • Switch up the pasta: Try wholegrain, gluten-free, or filled pasta for variety.
    • Add spice: A pinch of chilli flakes or smoked paprika gives a lovely warmth.

    Serving Suggestions

    This creamy butternut squash pasta pairs beautifully with:

    • A simple green salad with lemon vinaigrette
    • Warm garlic bread or herby focaccia
    • A glass of sparkling apple juice
    • A sprinkle of roasted nuts (like walnuts or hazelnuts) for extra texture

    Final Thoughts

    This butternut squash pasta is the very definition of autumn comfort – golden, creamy, and deeply satisfying. It’s a reminder that seasonal cooking doesn’t have to be complicated – just a few simple ingredients, roasted slowly and stirred together with care.

    Serve it on a cool evening, with candles glowing and a blanket nearby, and enjoy every comforting bite of this autumn favourite.

  • Autumn Patio & Terrace Decor: Creating a Cosy Country Retreat Outdoors

    Autumn Patio & Terrace Decor: Creating a Cosy Country Retreat Outdoors

    Just because the days are growing cooler doesn’t mean it’s time to head indoors. An autumn patio or terrace can be one of the loveliest places to enjoy the season – a space filled with warm light, natural textures, and that unmistakable golden glow of autumn afternoons.

    With a few thoughtful touches, you can transform your outdoor area into a cosy country retreat – perfect for slow mornings with coffee, golden-hour evenings, or gatherings under soft blankets and lantern light.

    Build Warmth with Layers & Textures

    As temperatures dip, it’s all about bringing warmth and comfort outdoors. Think of your patio or terrace as an extension of your living space:

    • Layer soft blankets and cushions in earthy autumn tones – rust, ochre, and deep green.
    • Add rugs or outdoor mats to define the seating area and make it feel grounded.
    • Choose textiles with texture – wool, cotton, and woven details bring that farmhouse charm.
    • Keep a basket of extra throws for guests (or for those longer evenings by the fire pit).

    Soft Furnishing Favourites

    Tartan Check Fleece Throw ~ £8.99 Shop Here

    Herringbone Pattern Throw ~ £4.99 Shop Here

    Geometric Outdoor Cushion Covers ~ £10.99 Shop Here

    Add Gentle Lighting

    As the evenings draw in earlier, lighting becomes your best friend. Soft, layered lighting makes the space inviting and magical:

    • Lanterns and hurricane lamps – line them along walls, steps, or tabletops for flickering warmth.
    • String lights – drape around railings, pergolas, or fences for a twinkling canopy.
    • Candles and tea-lights – perfect for still evenings when you want to unwind.
    • Solar or battery lights – add convenience and keep the glow going through the night.

    Lighting Essentials

    Fairy Lights ~ £3.99 Shop Here

    Decorative Lantern ~ £9.99 Shop Here

    Leaves Solar Lantern ~ £16.19 Shop Here

    Bring Nature In

    Embrace the season’s natural beauty by adding autumn foliage and rustic textures to your patio decor:

    • Display pots of heather, chrysanthemums, or ornamental grasses in terracotta planters.
    • Fill baskets or crates with mini pumpkins, gourds, and pinecones.
    • Add a wreath or garland made from dried leaves, wheat, or eucalyptus.
    • Scatter a few seasonal branches or logs for that woodland feel.

    These natural touches soften the space and tie your patio into the season’s earthy palette.

    Garden Touches

    Three Pack Terracotta Plant Pots ~ £24.99 Shop Here

    Heather Plants Mixed ~ £15.99 Shop Here

    Planter Flower Pot ~ £12.25 Shop Here

    Create a Focal Point

    Every cosy outdoor space benefits from a central gathering spot – something that invites you to linger even as the air turns crisp:

    • A fire pit or chiminea brings warmth and that lovely crackle of wood.
    • A small bistro table is perfect for autumn breakfasts or evening drinks.
    • An outdoor heater or log burner extends your season comfortably into late autumn.

    Arrange seating around your chosen focal point to make it feel intimate and welcoming.

    Outdoor Log Burner

    Outdoor Log Burner ~ £29.95 Shop Here

    Outdoor Garden Coffee Table ~ £33.95 Shop Here

    Outdoor Pyramid Patio Heater ~ £199.99 Shop Here

    Style with Seasonal Touches

    A few small, seasonal accents make all the difference:

    • Use autumn-hued cushions and patterned throws to bring colour and depth.
    • Add table decor like candles, rustic wooden trays, or vases filled with dried flowers.
    • Keep enamel mugs or thermos flasks nearby for hot chocolate or spiced tea evenings.
    • If space allows, hang curtains or windbreak panels to make the area feel enclosed and cosy.

    These simple details add charm and create that sense of “indoor comfort, outdoors.”

    Furniture for Comfort & Style

    If you’re refreshing your patio this season, look for furniture that blends comfort with rustic charm:

    • Wooden benches or Adirondack chairs for a timeless look.
    • Rattan or wicker sets with soft cushions for country elegance.
    • Metal bistro tables for smaller terraces or balcony spaces.
    • Weatherproof covers and storage to keep everything protected through the colder months.

    Final Thoughts

    An autumn patio or terrace is more than just an outdoor space – it’s an escape, a quiet retreat where you can slow down and enjoy the beauty of the season. With a few layers of warmth, soft light, and natural textures, you can turn even the smallest corner into a peaceful haven.

    Wrap up in a blanket, light a few candles, and listen to the rustle of leaves as the evening sets in – the simple magic of autumn, right at your doorstep. 


    Affiliate Disclaimer

    Some of the links in this post are affiliate links. This means I may earn a small commission if you make a purchase through these links – at no extra cost to you. I only recommend products I love and think will help you create a cosy and seasonal outdoor garden space.

  • Chickpea & Apple Stew: A Comforting, Vegetarian Take on a Seasonal Classic

    Chickpea & Apple Stew: A Comforting, Vegetarian Take on a Seasonal Classic

    This Chickpea & Apple Stew is everything you want from an autumn meal – warm, wholesome, and full of gentle seasonal flavour. The tender chickpeas and soft chunks of apple create a beautiful balance of savoury and sweet, with herbs and spices that feel both comforting and fresh.

    It’s a lovely vegetarian twist on the classic chicken and apple stew – hearty enough for cooler evenings, yet light enough to enjoy with crusty bread and a mug of spiced tea.

    Ingredients (Serves 4)

    • 2 tbsp olive oil
    • 1 onion, finely chopped
    • 2 garlic cloves, minced
    • 1 carrot, chopped
    • 2 celery sticks, sliced
    • 2 medium apples (firm and slightly tart, like Braeburn or Cox), peeled and chopped
    • 1 tsp ground cumin
    • ½ tsp smoked paprika
    • ¼ tsp ground cinnamon
    • 1 tbsp tomato purée
    • 400 g tin chopped tomatoes
    • 400 g tin chickpeas, drained and rinsed
    • 300 ml vegetable stock
    • 1 tsp fresh thyme (or ½ tsp dried)
    • Salt and black pepper, to taste
    • Fresh parsley or thyme, to serve

    Recipe

    Step 1: Build the Flavour

    1. Heat the olive oil in a large pot or casserole dish over medium heat.
    2. Add the onion, carrot, and celery. Cook for 5–7 minutes until softened.
    3. Stir in the garlic, cumin, paprika, and cinnamon, cooking for another minute until fragrant.

    Step 2: Add the Apples & Base

    1. Stir in the chopped apples and tomato purée.
    2. Add the chopped tomatoes, chickpeas, and vegetable stock.
    3. Sprinkle in the thyme, season with salt and pepper, and stir everything together.

    Step 3: Simmer to Perfection

    1. Bring to a gentle boil, then reduce the heat and simmer for 25–30 minutes, stirring occasionally.
    2. The apples will soften and begin to melt into the stew, adding a lovely sweetness that balances the savoury broth.

    Step 4: Serve

    Taste and adjust seasoning as needed. Serve warm with crusty bread or spooned over rice or couscous. Garnish with a few sprigs of fresh thyme or chopped parsley.

    Serving Ideas

    • With Crusty Bread: Perfect for soaking up the rich, fragrant sauce.
    • Over Grains: Serve with rice, quinoa, or bulgur for a heartier meal.
    • With a Green Salad: Something crisp and simple pairs beautifully with the stew’s warmth.
    • Topped with Yoghurt or Feta: For a creamy finish and a touch of tang.

    Tips & Variations

    • Add greens: Stir in kale or spinach near the end for extra colour and nutrients.
    • Make it creamy: Swirl in a little coconut milk or cream for a silky texture.
    • Add spice: For a bolder kick, sprinkle in chilli flakes or use a touch of curry powder.
    • Batch cook: This stew keeps beautifully – store leftovers in the fridge for up to 3 days or freeze for easy autumn lunches.

    Final Thoughts

    This Chickpea & Apple Stew is a gentle nod to tradition – a dish that captures all the comfort of a classic chicken stew, but with a fresh, vegetarian twist. The apples bring a subtle sweetness, the chickpeas add hearty texture, and together they create something truly nourishing for cool autumn days.

    It’s simple, seasonal cooking at its best – made to be enjoyed slowly, with good bread, candlelight, and that unmistakable feeling of autumn warmth.

  • Chicken and Mushroom Pie: A Hearty, Homely Classic for Cosy Evenings

    Chicken and Mushroom Pie: A Hearty, Homely Classic for Cosy Evenings

    There’s something truly comforting about a chicken and mushroom pie – golden pastry, rich creamy filling, and that familiar warmth that fills the kitchen as it bakes. It’s one of those timeless dishes that feels like home, especially as the days grow cooler and evenings draw in.

    Served with buttery mash or crisp seasonal greens, this pie makes a perfect autumn supper – comforting, filling, and full of flavour.

    Ingredients (Serves 4-6)

    For the Filling:

    • 2 tbsp olive oil or butter
    • 1 onion, finely chopped
    • 2 garlic cloves, crushed
    • 250 g mushrooms, sliced (closed cup or chestnut work well)
    • 2 tbsp plain flour
    • 500 g cooked chicken, shredded or diced
    • 400 ml chicken stock
    • 100 ml double cream or crème fraîche
    • 1 tsp Dijon mustard (optional, for flavour)
    • 1 tsp thyme leaves
    • Salt and black pepper, to taste

    For the Pastry:

    • 1 sheet of ready-rolled puff pastry (or shortcrust, if you prefer)
    • 1 egg, beaten (for glazing)

    Recipe

    Step 1: Make the Filling

    1. Heat the oil or butter in a large pan over medium heat.
    2. Add the onion and cook for 5 minutes until softened.
    3. Stir in the garlic and mushrooms, cooking for another 5–6 minutes until the mushrooms release their juices and start to brown.
    4. Sprinkle over the flour and stir well to coat everything.
    5. Gradually pour in the chicken stock, stirring until smooth and slightly thickened.
    6. Add the chicken, cream, mustard (if using), and thyme.
    7. Simmer gently for 5–10 minutes, until the filling is rich and creamy.
    8. Season well with salt and pepper, then remove from the heat and let it cool slightly.

    Step 2: Assemble the Pie

    1. Preheat your oven to 190°C (fan).
    2. Spoon the filling into a pie dish.
    3. Lay the pastry over the top, trimming any excess and pressing the edges to seal.
    4. Use the back of a fork to crimp the edges, and cut a small slit in the centre to let steam escape.
    5. Brush the top with beaten egg for a golden finish.

    Step 3: Bake

    Bake for 25–30 minutes, until the pastry is puffed and golden brown.

    Let the pie rest for a few minutes before serving.

    Serving Suggestions

    Serve your chicken and mushroom pie with:

    • Creamy mashed potatoes or buttery new potatoes
    • Steamed greens like broccoli, kale, or cabbage
    • Carrots and peas for a pop of colour and sweetness

    For a rustic farmhouse table setting, serve it straight from the dish – bubbling and golden – surrounded by warm lighting and linen napkins.

    Tips & Variations

    • Make ahead: The filling can be prepared a day in advance and stored in the fridge until you’re ready to bake.
    • Add vegetables: Leeks, spinach, or sweetcorn work beautifully.
    • Use leftover chicken: This pie is perfect for using up a roast chicken from Sunday dinner.
    • Make it a pot pie: Use individual ramekins for single servings – they bake beautifully and look charming for dinner parties.

    Final Thoughts

    A chicken and mushroom pie is the kind of meal that brings everyone to the table – warm, hearty, and satisfying. With its buttery pastry and creamy, herby filling, it’s autumn comfort food at its very best.

    Serve it on a cool evening, with candles lit and the rain tapping against the window, and enjoy that familiar, homely feeling that only a good pie can bring.