Category: Spring Blossoms

  • What to Plant in Your Vegetable Garden in Spring: A Gentle Guide to Growing Through the Season

    What to Plant in Your Vegetable Garden in Spring: A Gentle Guide to Growing Through the Season

    Spring is the season of beginning again.

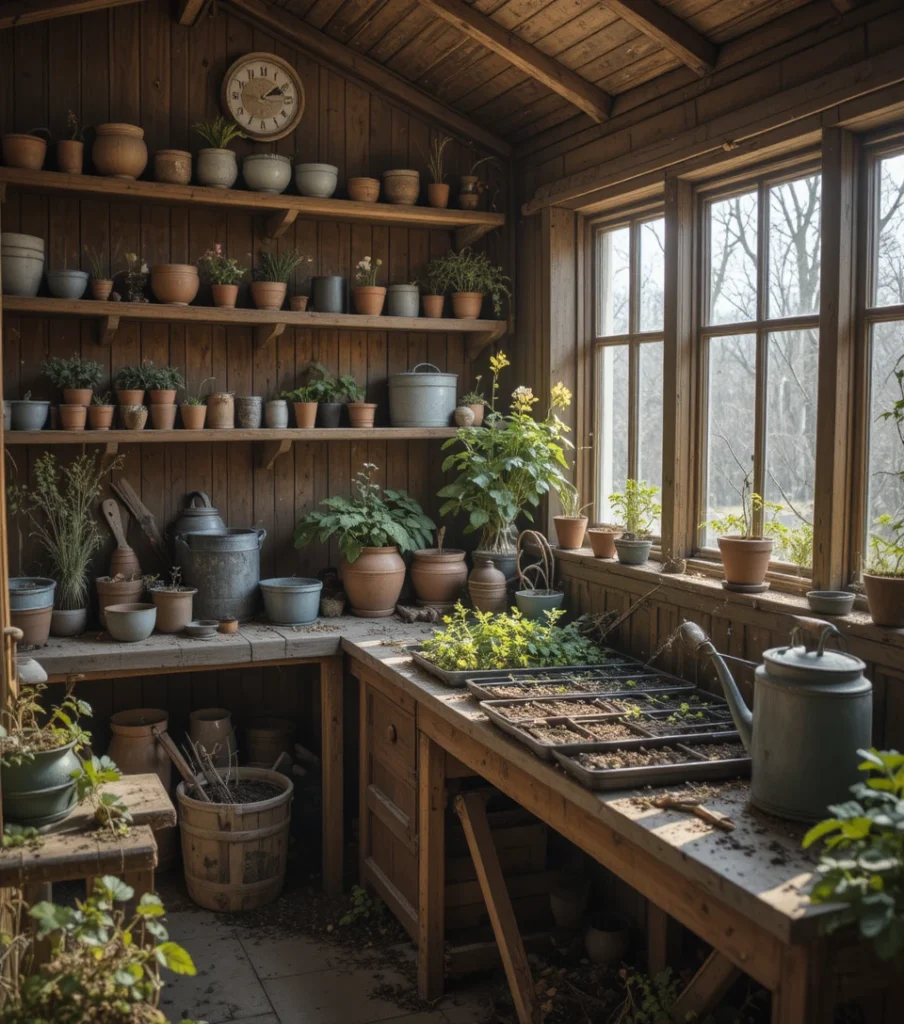
    The soil softens. The mornings feel hopeful. Garden beds that sat quietly through winter now wait for new life. There is something deeply grounding about pressing seeds into cool earth and trusting that, in time, they will rise.

    Planting a vegetable garden in spring is not about perfection or abundance overnight. It’s about small, steady growth. About noticing the light shift. About stepping outside with muddy hands and a sense of possibility.

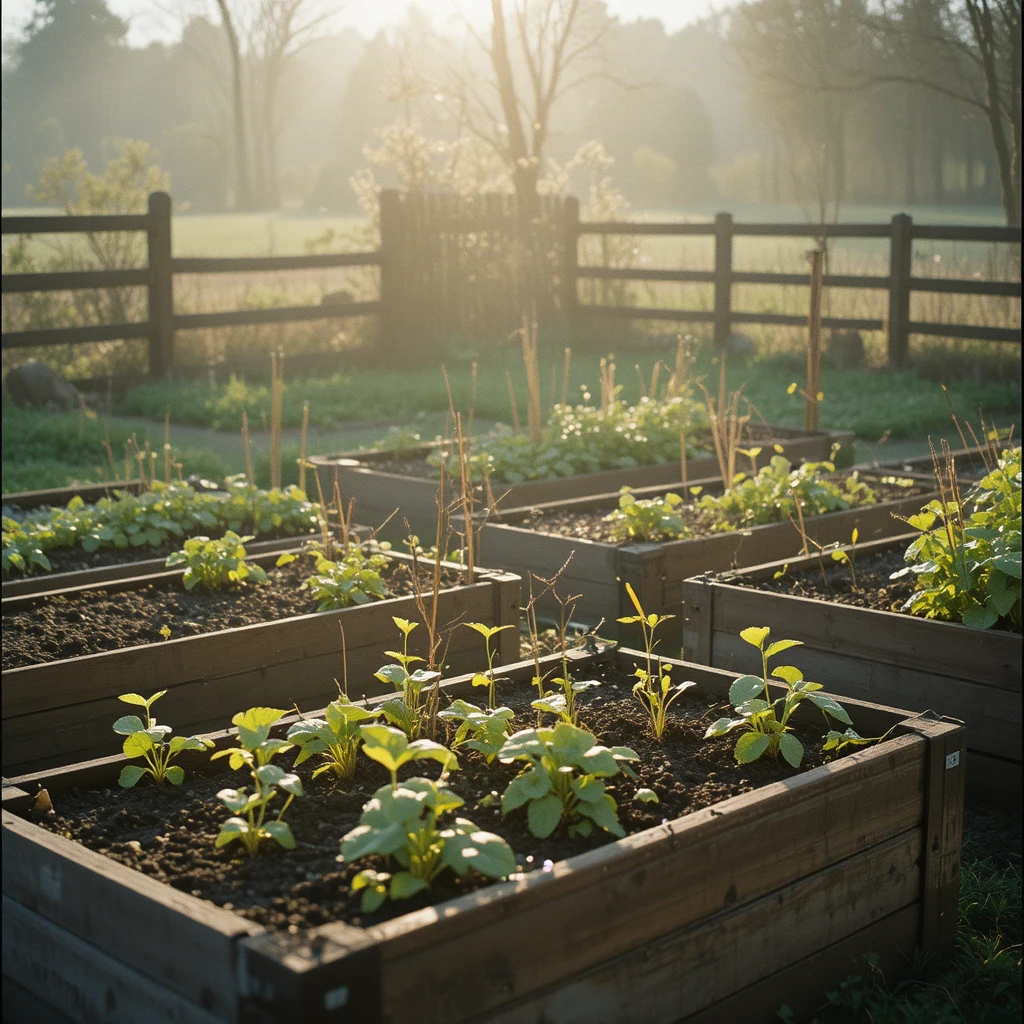
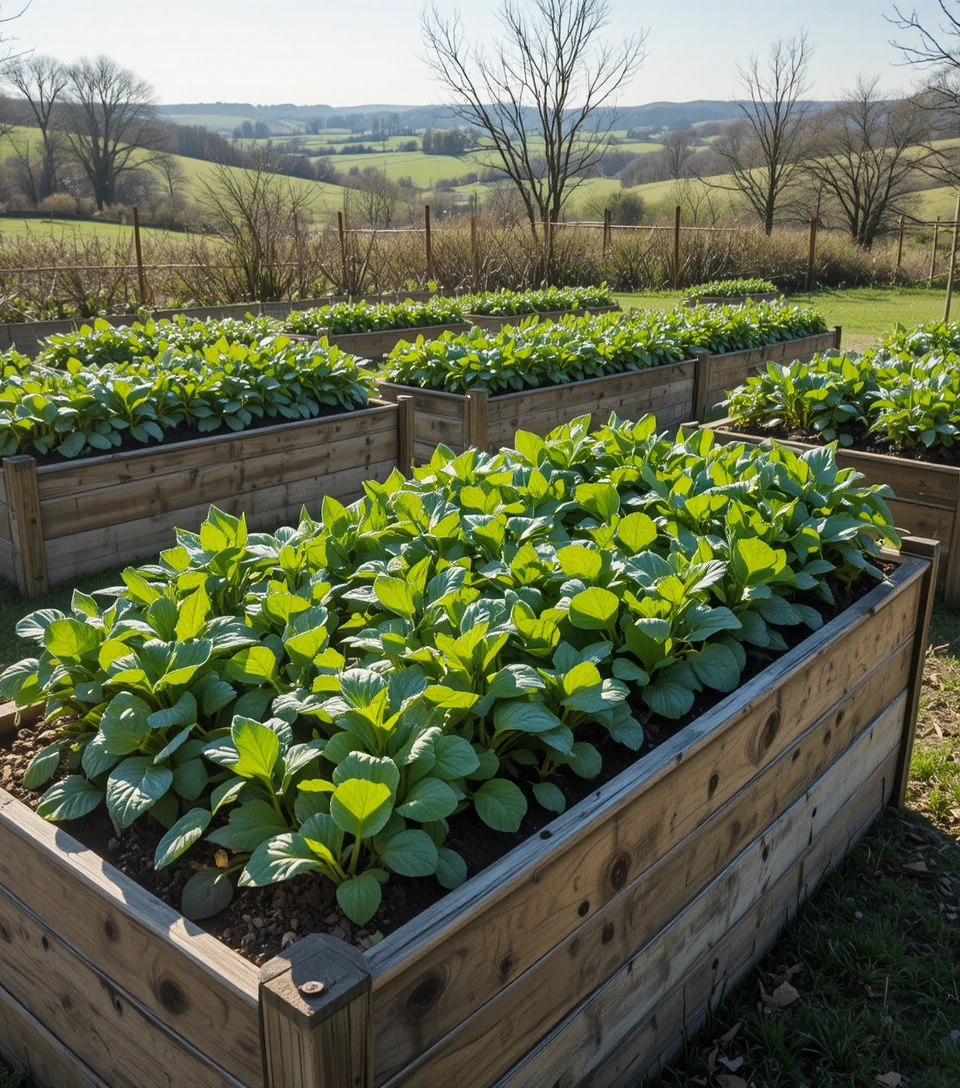
    Whether you have a full countryside plot or a few raised beds tucked beside your home, spring is the perfect time to begin.

    Why Spring Is the Ideal Time to Plant

    Spring offers:

    • Warmer soil temperatures
    • Increasing daylight hours
    • Natural rainfall
    • Longer growing seasons ahead

    Vegetables planted now have time to establish strong roots before the heat of summer. Early sowing also allows for staggered harvests – something that keeps your kitchen gently stocked for months. Spring gardening isn’t rushed. It’s layered. Thoughtful. Intentional.

    Early Spring Vegetables to Plant (Perfect for March–April in the UK)

    Carrots

    Carrots thrive in cool soil and can be sown directly outdoors.

    Why plant them now?
    They prefer steady, mild temperatures and dislike being transplanted.

    Growing tip:
    Sow thinly in well-drained soil and keep evenly moist.

    Perfect for: summer harvests and soft countryside soups.

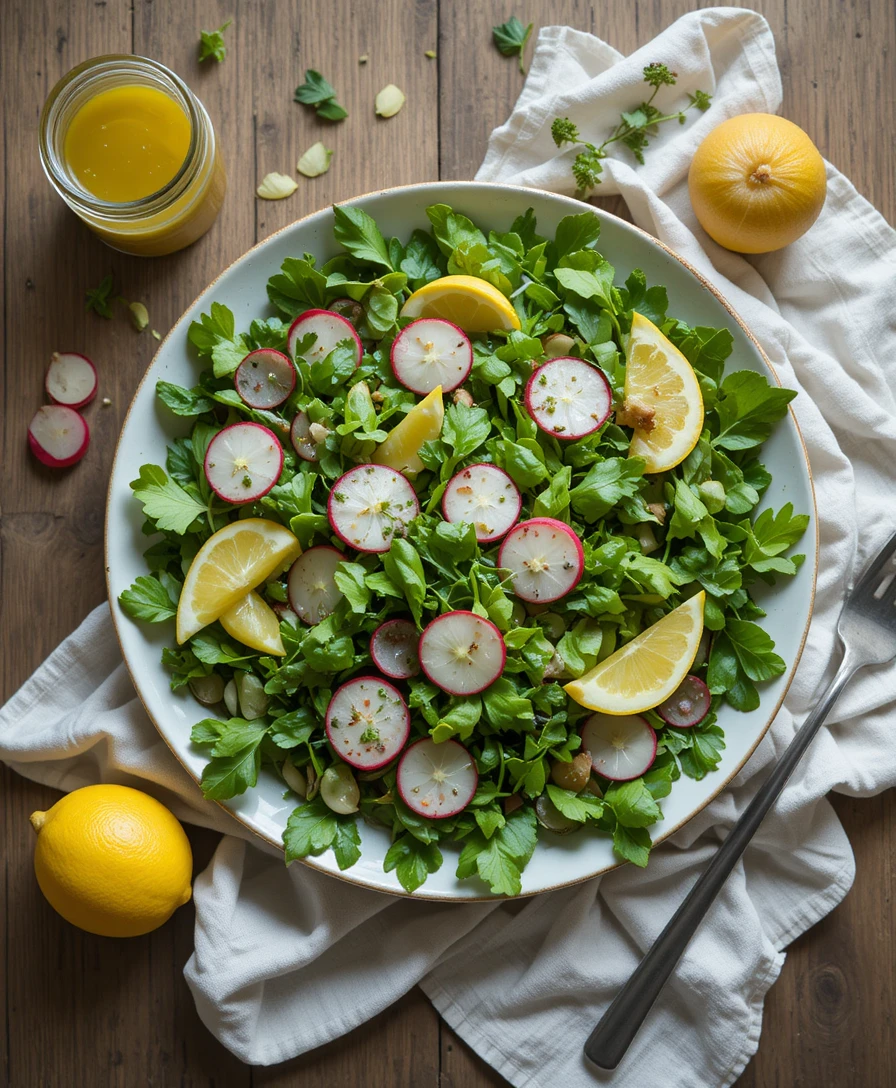
    Lettuce & Salad Leaves

    Quick-growing and beginner-friendly.

    Why plant them now?
    Cool weather prevents bolting and keeps leaves tender.

    Sow every few weeks for continuous harvests – a gentle rhythm that keeps your garden productive.

    Spring Onions

    Easy and reliable.

    Why plant them now?
    They grow steadily in mild weather and are ready within weeks.

    Ideal for salads, soups, and soft spring suppers.
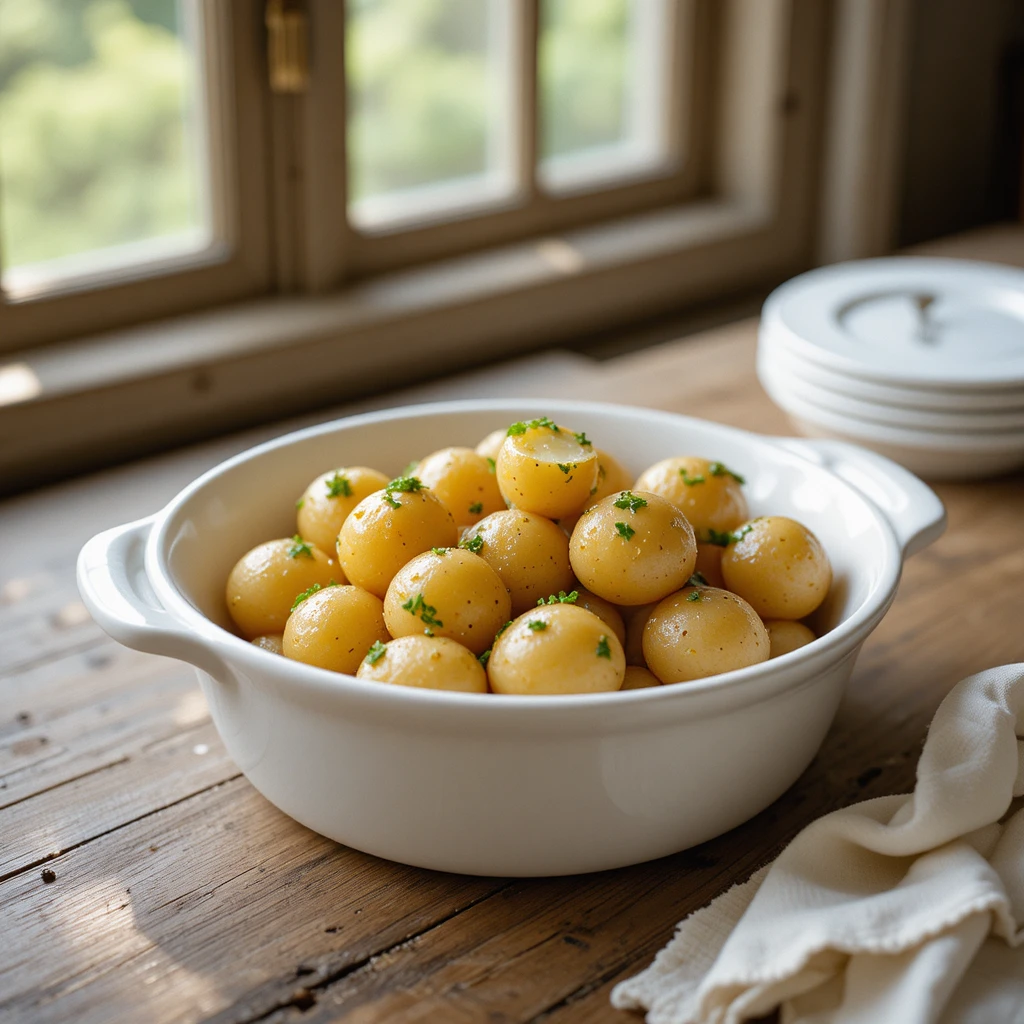
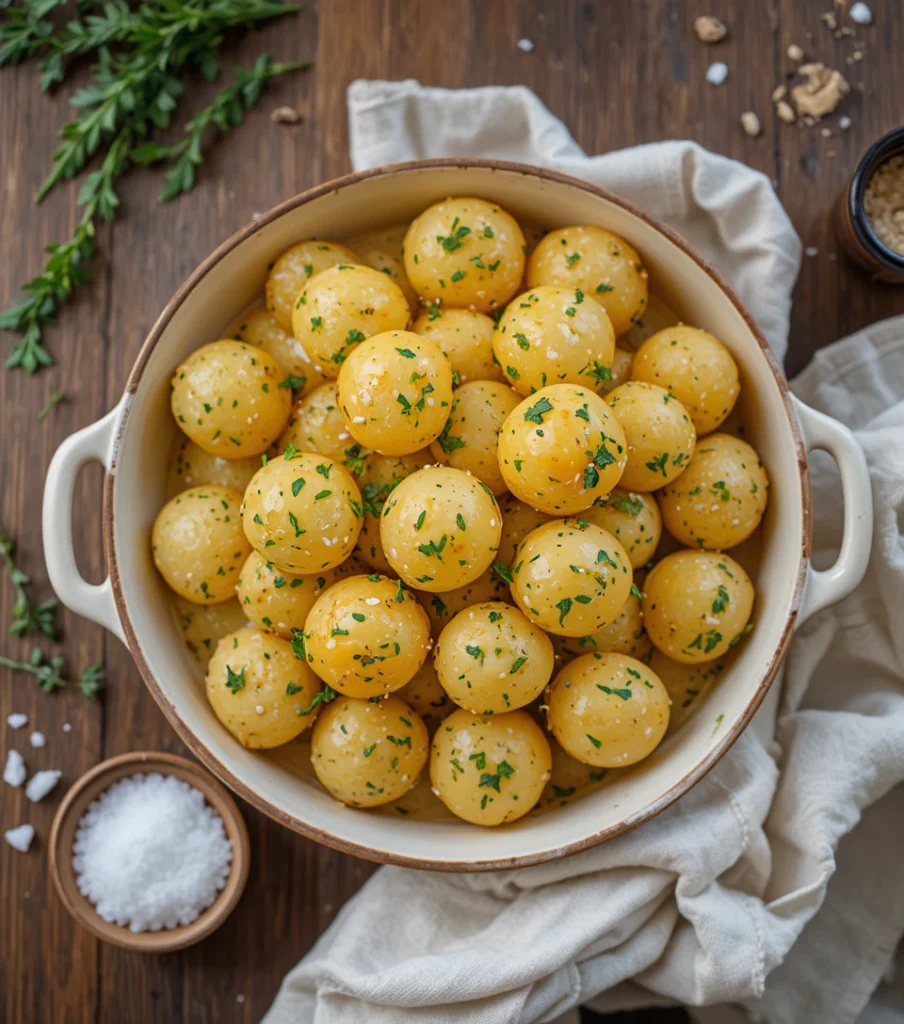
    Early Potatoes

    Plant chitted seed potatoes in early to mid-spring.

    Why plant them now?
    They establish before peak pest season and produce tender new potatoes.

    Nothing feels more satisfying than lifting the first early harvest.

    Mid to Late Spring Vegetables (Perfect for April–May)

    Peas

    Sweet, charming, and beautifully seasonal.

    Growing tip:
    Provide supports early and keep well watered.

    They bring both harvest and visual softness to the garden.

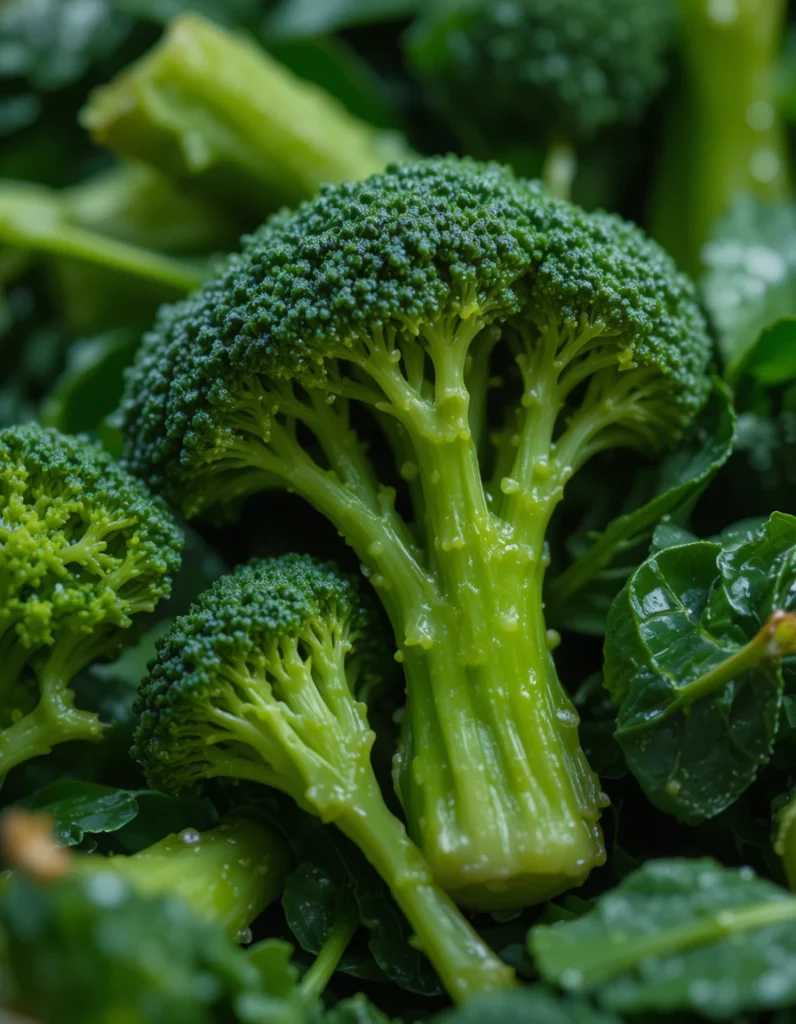
    Broccoli & Brassicas

    Start indoors or purchase young plants.

    Why plant now?
    They prefer cooler conditions to establish before summer heat.
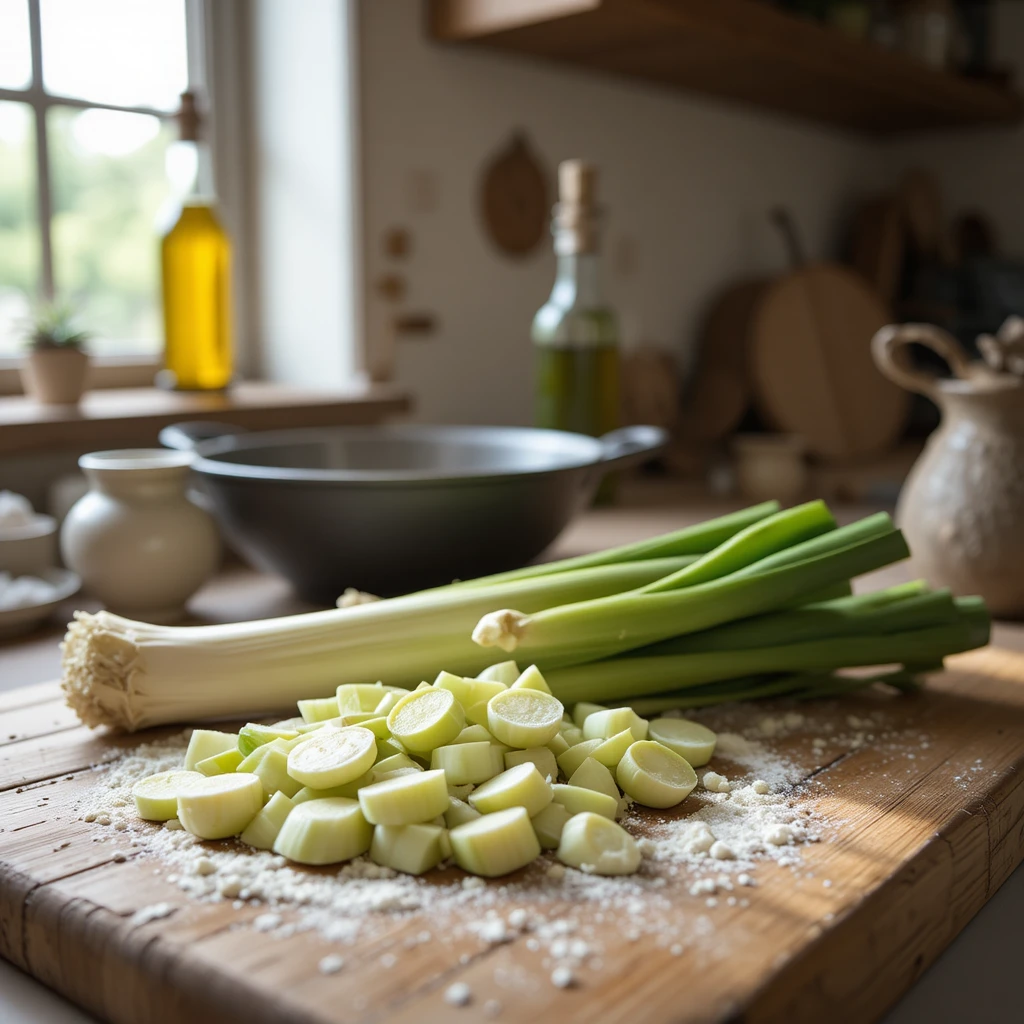
    Courgettes

    Plant after the last frost risk.

    They grow generously – often surprisingly so – and become a staple of summer meals.

    Herbs to Plant in Spring

    Herbs feel especially aligned with a gentle spring garden.

    Consider planting:

    • Basil (after frost risk)
    • Parsley
    • Chives
    • Thyme
    • Mint (keep contained)
    • Dill

    Fresh herbs elevate simple meals and make the garden feel alive and fragrant.

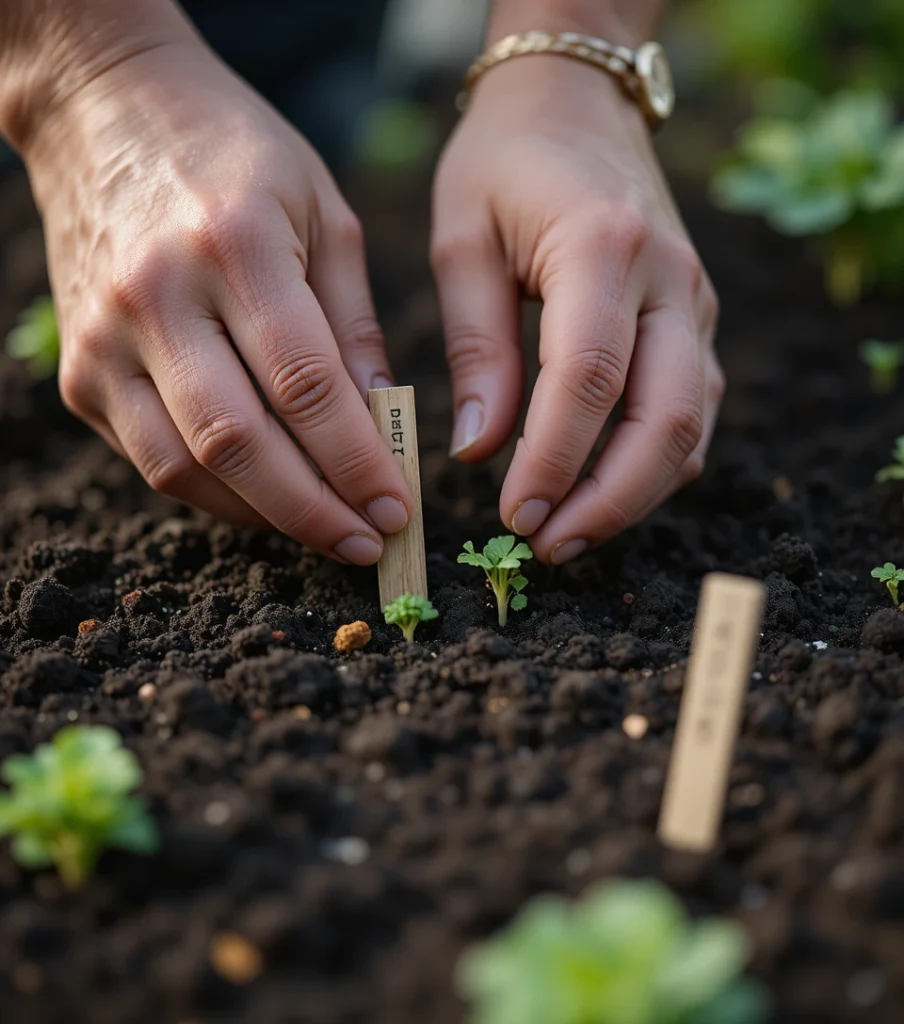
    Tips for a Successful Spring Vegetable Garden

    1. Prepare your soil well – remove weeds and add compost.
    2. Check frost dates before planting tender crops.
    3. Label everything clearly.
    4. Water gently but consistently.
    5. Stagger sowing to avoid everything ripening at once.
    6. Begin small rather than overwhelming yourself.

    Gardening should feel grounding – not stressful.

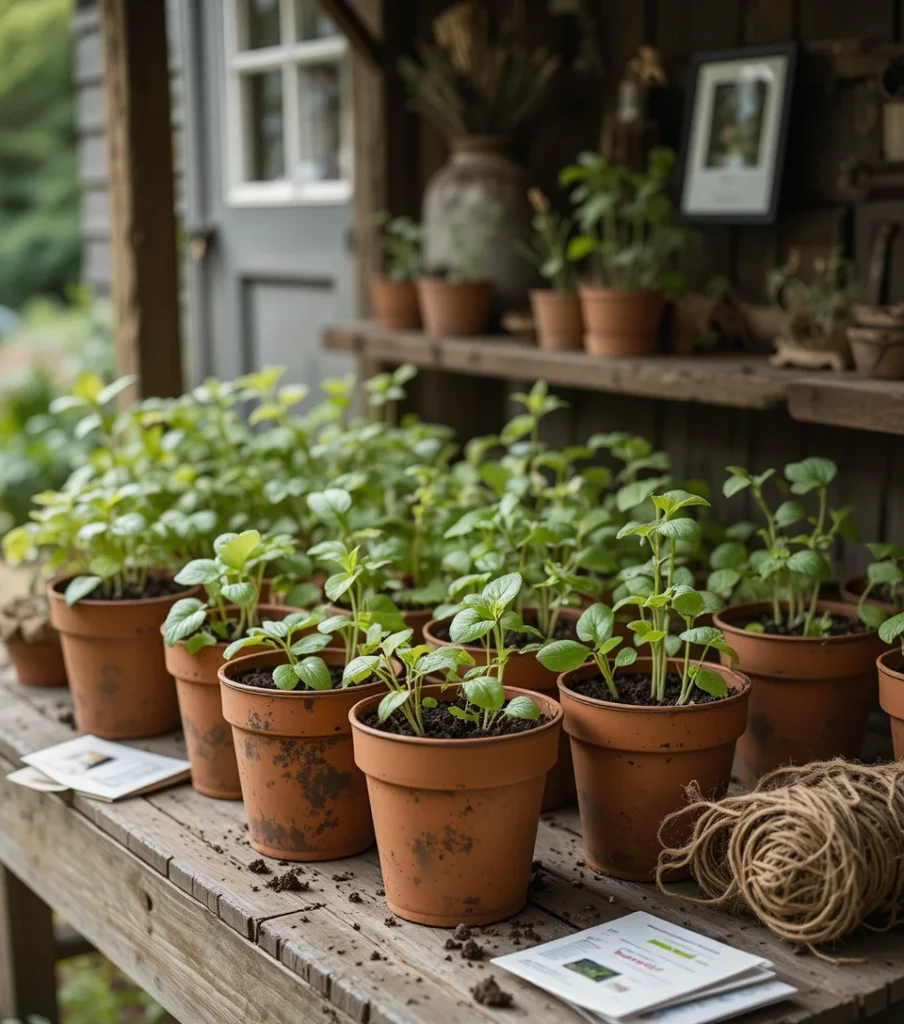
    Growing in Small Spaces

    Even if you don’t have a large plot, you can grow:

    • Lettuce in containers
    • Herbs in window boxes
    • Carrots in deep pots
    • Potatoes in grow bags
    • Peas in vertical planters

    Spring gardening is about intention, not scale. A few pots on a patio can feel just as meaningful as rows in a field.

    Final Thoughts

    Vegetable gardening teaches patience.

    Not every seed will sprout. Not every crop will thrive. And that is part of the process. Spring reminds us that growth happens gradually – beneath the surface first, quietly and unseen.

    Plant what feels manageable. Tend it gently. Watch it change week by week. There is something deeply comforting about eating something you planted months earlier. It’s a reminder that small beginnings matter. And spring is full of them.

  • Homemade Vanilla Ice Cream: A Soft & Simple Spring Dessert

    Homemade Vanilla Ice Cream: A Soft & Simple Spring Dessert

    As spring begins to lean towards summer, desserts become lighter.

    We move away from warm crumbles and baked puddings and start craving something cool, delicate, and quietly indulgent. Homemade vanilla ice cream feels like the perfect bridge between the seasons – simple, creamy, and endlessly adaptable.

    There is something nostalgic about making ice cream from scratch. The slow whisking, the gentle heating of cream, the scent of vanilla drifting through the kitchen. It feels thoughtful. Intentional.

    Served with fresh berries or spooned beside warm spring bakes, vanilla ice cream becomes more than just dessert – it becomes a small celebration of the season.

    Why Vanilla Works So Beautifully in Spring

    Vanilla is soft and floral rather than heavy. It pairs effortlessly with:

    • Fresh strawberries
    • Poached rhubarb
    • Lemon cake
    • Shortbread
    • Spring tarts
    • Honey and edible flowers

    Its simplicity allows seasonal ingredients to shine, which makes it perfect for spring entertaining or gentle weekend treats. Light. Elegant. Comforting without being rich.

    Homemade Vanilla Ice Cream Recipe (serves: 6)

    Prep time: 15 minutes

    Chilling & freezing time: 4–6 hours

    Ingredients

    • 500ml double cream
    • 250ml whole milk
    • 4 large egg yolks
    • 120g caster sugar
    • 1 vanilla pod (or 2 teaspoons pure vanilla extract)
    • Pinch of sea salt

    Recipe

    Step 1: Infuse the cream

    In a saucepan, gently heat the cream and milk over medium-low heat.

    If using a vanilla pod, split it lengthways, scrape out the seeds, and add both seeds and pod to the pan.

    Heat until just steaming – do not boil. Remove from heat and allow to infuse for 10 minutes.

    Step 2: Whisk the egg mixture

    In a separate bowl, whisk together egg yolks and caster sugar until pale and slightly thickened.

    Step 3: Temper gently

    Remove the vanilla pod from the cream mixture (if using). Slowly pour the warm cream into the egg mixture, whisking constantly.

    Step 4: Thicken the custard

    Return the mixture to the saucepan and cook over low heat, stirring gently with a wooden spoon. Cook until the custard thickens enough to coat the back of the spoon. Do not allow it to boil.

    Step 5: Chill thoroughly

    Pour into a bowl, cover, and refrigerate for at least 2 hours (preferably longer).

    Step 6: Churn or freeze

    If using an ice cream maker, churn according to instructions. If not, pour into a freezer-safe container and freeze, stirring every 30–45 minutes for 3–4 hours to break up ice crystals. Once frozen, allow to soften slightly before serving.

    How to Serve Homemade Vanilla Ice Cream

    In spring, keep it simple and seasonal.

    Serve with:

    • Fresh strawberries or raspberries
    • Poached rhubarb
    • Warm lemon drizzle cake
    • Shortbread biscuits
    • Honey and crushed pistachios
    • A scattering of edible flowers

    For a soft countryside aesthetic, scoop into small white bowls and top with a few fresh berries and a sprig of mint.

    Perfect for:

    • Garden lunches
    • Easter dessert tables
    • Afternoon tea
    • Quiet Sunday evenings
    • Soft spring gatherings

    How to Use Leftovers

    Homemade ice cream keeps well in the freezer for up to 2 weeks.

    You can also:

    • Create Ice Cream Sandwiches
    • Add to Spring Bakes
    • Affogato Style
    • Brunch Addition

    Gentle Variations

    To keep this aligned with the season, you could:

    • Add lemon zest for brightness
    • Fold through crushed strawberries
    • Infuse with lavender (very lightly)
    • Add honey instead of some sugar
    • Swirl through a ripple of rhubarb compote

    Spring desserts are about balance – light sweetness, soft texture, fresh flavours.

    Final Thoughts

    There is something deeply comforting about a bowl of homemade ice cream. It asks you to slow down. To wait while it churns. To anticipate. Spring often feels like that too – a quiet build towards warmth and abundance.

    Homemade vanilla ice cream captures that feeling perfectly. Gentle. Simple. Thoughtful. A dessert that doesn’t overwhelm, but softly delights. And sometimes, that is exactly what the season calls for.

  • Salmon & Cream Cheese Sandwich: A Light & Elegant Spring Lunch

    Salmon & Cream Cheese Sandwich: A Light & Elegant Spring Lunch

    There is something timeless about a salmon and cream cheese sandwich.

    It feels gently nostalgic – like something served at a spring gathering, laid out on a wooden table beside fresh flowers and chilled drinks. Yet it is also wonderfully simple. Fresh bread, soft cream cheese, delicate salmon, and a scattering of herbs. As spring arrives, lunches naturally become lighter. We begin craving freshness, subtle flavour, and meals that feel nourishing without being heavy.

    A salmon and cream cheese sandwich captures that perfectly. It’s bright from lemon, softened by cream cheese, and lifted by fresh herbs. A simple lunch that feels quietly refined.

    Why This Sandwich Feels Like Spring

    Spring meals often focus on:

    • Fresh herbs
    • Citrus brightness
    • Lighter textures
    • Seasonal greens
    • Balanced flavours

    Salmon brings gentle richness. Cream cheese adds softness. Lemon and herbs bring lift. Together, they create a sandwich that feels fresh, clean, and thoughtfully prepared – perfect for open-window afternoons and garden lunches.

    Salmon & Cream Cheese Sandwich Recipe (serves: 2)

    Prep time: 10 minutes

    No cooking required (if using pre-cooked or smoked salmon)

    Ingredients

    • 4 slices fresh bread (granary, sourdough, or soft white)
    • 150g smoked salmon (or cooked flaked salmon)
    • 100g cream cheese
    • Small handful fresh dill, finely chopped
    • Small handful fresh chives, finely sliced
    • Squeeze of lemon juice
    • Freshly ground black pepper
    • A few crisp lettuce leaves or rocket
    • Optional: thinly sliced cucumber

    Recipe

    Step 1: Prepare the cream cheese

    In a small bowl, mix the cream cheese with:

    • Fresh dill
    • Chives
    • A small squeeze of lemon juice
    • A pinch of black pepper

    Stir until smooth and lightly flecked with herbs.

    Step 2: Prepare the bread

    Lightly butter the bread if desired, especially if using soft white bread. Spread a generous layer of the herbed cream cheese on each slice.

    Step 3: Assemble gently

    Layer the salmon evenly over two slices of bread. Add lettuce or rocket for freshness. Add thin cucumber slices if using. Place the remaining slices of bread on top and press gently.

    Step 4: Slice & serve

    Cut into halves or triangles for a classic spring presentation.

    Serve immediately.

    How to Serve a Salmon & Cream Cheese Sandwich

    This sandwich pairs beautifully with:

    It’s perfect for:

    • A light spring lunch
    • Garden gatherings
    • Afternoon tea
    • Picnic baskets
    • Easter weekend meals
    • A soft midweek reset

    For a countryside aesthetic, serve on a white ceramic plate with a few extra dill sprigs and a lemon wedge on the side.

    How to Use Leftovers

    If you have leftover salmon or herbed cream cheese:

    • Spring Bagel
    • Light Salad Bowl
    • Brunch Plate
    • Open-Faced Toast

    Gentle Variations

    To keep this sandwich aligned with spring, you could:

    • Add capers for saltiness
    • Include shaved fennel for crunch
    • Swap dill for parsley
    • Add a thin spread of wholegrain mustard
    • Use crème fraîche instead of cream cheese for lightness
    • Add avocado slices for creaminess

    The key is balance – soft, fresh, and lightly bright.

    Final Thoughts

    Spring lunches don’t need to be elaborate.

    Sometimes, the most satisfying meals are the simplest – thoughtfully layered ingredients, fresh bread, and a few carefully chosen herbs.

    A salmon and cream cheese sandwich feels like a small celebration of the season. Clean flavours. Gentle textures. Light yet nourishing.

    The kind of lunch that encourages you to slow down and sit for a while.

    And in spring, that feels just right.

  • Homemade Garlic Bread: A Warm & Comforting Spring Side

    Homemade Garlic Bread: A Warm & Comforting Spring Side

    Spring evenings can be unpredictable.

    The afternoons may feel bright and hopeful, but as the sun dips lower, there’s still a gentle chill in the air. It’s in these in-between moments that warm, simple sides feel just right.

    Homemade garlic bread is one of those timeless additions to the table. Crisp at the edges, soft in the centre, fragrant with butter and fresh garlic – it pairs beautifully with lighter spring meals while still offering comfort.

    Served beside creamy risotto, a fresh salad, or a bowl of spring soup, it completes the table without overwhelming it. Simple. Warm. Quietly satisfying.

    Why Garlic Bread Works in Spring

    Spring cooking leans into:

    • Fresh herbs
    • Lighter mains
    • Seasonal vegetables
    • Balanced flavours

    Garlic bread offers warmth without heaviness. When made with fresh parsley and good butter, it feels vibrant rather than rich. It becomes a soft complement rather than the centrepiece – the kind of side that encourages a second slice without feeling indulgent.

    Homemade Garlic Bread Recipe (serves: 4)

    Prep time: 10 minutes

    Bake time: 12–15 minutes

    Ingredients

    • 1 large baguette or crusty loaf
    • 100g softened salted butter
    • 2–3 garlic cloves, finely minced
    • Small handful fresh parsley, finely chopped
    • Small handful fresh chives (optional)
    • Pinch of sea salt
    • Freshly ground black pepper
    • Optional: 30g grated parmesan

    Recipe

    Step 1: Prepare the garlic butter

    In a bowl, combine:

    • Softened butter
    • Minced garlic
    • Fresh parsley
    • Chives (if using)
    • A small pinch of salt
    • Black pepper

    Mix until smooth and evenly flecked with herbs. If adding parmesan, stir it through now.

    Step 2: Prepare the bread

    Slice the baguette lengthways or into thick diagonal slices, leaving the base intact if you prefer pull-apart style. Spread the garlic butter generously over each cut surface.

    Step 3: Bake gently

    Wrap loosely in foil and bake at 180°C (fan 160°C) for 10 minutes. Unwrap and bake for a further 3–5 minutes until lightly golden and crisp at the edges.

    Step 4: Serve warm

    Remove from the oven and allow to rest for a minute before serving. Scatter a little extra fresh parsley over the top for colour.

    How to Serve Garlic Bread in Spring

    Garlic bread pairs beautifully with:

    It works for:

    • Soft Sunday dinners
    • Garden gatherings
    • Light spring suppers
    • Sharing platters
    • Casual evenings with friends

    Serve on a wooden board or white ceramic plate, with herbs scattered loosely and the scent of garlic filling the kitchen.

    How to Use Leftovers

    If you happen to have any left:

    Gentle Variations

    To keep this dish aligned with spring, you could:

    • Add lemon zest for brightness
    • Use wild garlic when in season
    • Stir through soft goat’s cheese
    • Add a drizzle of olive oil before baking
    • Sprinkle with flaky sea salt

    The key is freshness – allowing the herbs to lift the warmth of the garlic.

    Final Thoughts

    Garlic bread is uncomplicated. It doesn’t require delicate plating or elaborate preparation. It simply asks for good butter, fresh garlic, and a warm oven. In spring, when meals begin to lighten but evenings still call for comfort, it feels like the perfect companion. Warm slices passed around the table. Soft conversation. A second helping taken without hesitation. Sometimes the simplest sides become the most loved.

  • Spring Letter Writing: A Gentle Return to Thoughtful Words

    Spring Letter Writing: A Gentle Return to Thoughtful Words

    As the days grow lighter and the air softens, there’s something about spring that invites us to reconnect.

    Not through quick messages or hurried replies – but through something slower. Something intentional.

    Spring letter writing feels like opening a window after a long winter. It’s a return to paper, to ink, to carefully chosen words. It’s the quiet act of sitting at a sunlit desk and letting your thoughts unfold slowly, one page at a time.

    In a season centred around renewal and growth, writing a letter feels like planting something meaningful.

    Why Letter Writing Feels So Right in Spring

    Spring is about beginning again.

    We clear cupboards, refresh routines, and open doors that have been closed against the cold. Letter writing mirrors this gentle reset.

    It allows you to:

    • Slow down your thoughts
    • Connect more deeply with someone
    • Express gratitude or reflection
    • Create something tangible
    • Romanticise everyday life

    Unlike digital communication, a letter asks you to pause. To sit. To think. To write with care. And that quiet pause feels very spring.

    Creating a Spring Letter Writing Ritual

    Letter writing doesn’t need to feel formal. It can be soft, personal, and simple.

    You might:

    • Open the window slightly for fresh air
    • Place fresh flowers on your desk
    • Use cream or blush-toned paper
    • Choose a fountain pen or favourite fine liner
    • Light a delicate floral candle
    • Play soft instrumental music

    Let the ritual feel gentle. Not rushed. Not pressured. Even one letter a month can become something beautiful to look forward to.

    What to Write in a Spring Letter

    If you’re unsure where to begin, here are a few seasonal ideas:

    A Catch-Up Letter

    Share how your winter felt. Talk about what you’re looking forward to this spring. Describe small everyday moments.

    A Gratitude Letter

    Write to someone who has quietly supported you. Express appreciation for specific memories or gestures.

    A “Thinking of You” Note

    A short, simple letter that says: I thought of you when the blossom appeared. I thought of you when the light changed.

    A Future-Focused Letter

    Share intentions for the season ahead. Invite someone to join you in a slow spring ritual – a countryside walk, a garden lunch, a simple coffee date.

    Making Letters Feel Beautiful

    Part of the joy of letter writing is the tactile experience.

    Consider adding:

    • Pressed flowers (from your own garden)
    • A small hand-drawn illustration
    • Soft calligraphy headings
    • A spritz of linen spray
    • Wax seals for special occasions
    • Vintage-inspired stamps

    Cream paper, sage envelopes, blush ink – keep it cohesive and softly seasonal. The beauty is in the details.

    Spring Stationery Inspiration

    Spring lends itself to delicate, countryside aesthetics:

    • Floral borders
    • Botanical illustrations
    • Soft pastel envelopes
    • Linen-textured paper
    • Ribbon-tied bundles of letters
    • Nature-inspired stickers

    You could even create a small “spring correspondence box” to keep your supplies together – turning it into a ritual rather than an occasional task.

    The Quiet Impact of a Letter

    There is something deeply meaningful about receiving post that isn’t a bill or a leaflet.

    A handwritten letter says:

    I paused.
    I thought of you.
    I chose these words carefully.

    In a world that moves quickly, that feels almost radical. Spring letter writing isn’t about perfection. It’s about presence.

    Final Thoughts

    This season, instead of scrolling in the evening light, consider sitting at your desk with pen in hand.

    Let the birdsong filter through the open window. Let your words move slowly across the page.

    Write to someone you haven’t spoken to in a while. Write to someone who matters. Write without editing every line.

    Like blossom that blooms briefly but beautifully, letters hold a moment in time.

    And sometimes, that small act of thoughtfulness is enough to brighten someone’s entire season.

  • Asparagus & Parmesan Quiche: A Fresh & Elegant Spring Lunch

    Asparagus & Parmesan Quiche: A Fresh & Elegant Spring Lunch

    As spring settles in and the days begin to stretch, lunches become lighter, brighter, and a little more leisurely.

    Asparagus & parmesan quiche feels like the perfect dish for this time of year – delicate yet satisfying, simple yet quietly impressive. With golden pastry, tender green asparagus, and nutty parmesan folded into a soft egg filling, it brings together everything spring cooking should be: fresh, seasonal, and uncomplicated.

    It’s the sort of meal you place in the centre of the table, slice slowly, and serve with crisp salad and open windows.

    A soft celebration of the season.

    Why Asparagus Is Perfect for Spring

    Asparagus is one of the true stars of spring.

    Its short season makes it feel special – something to savour while it lasts. Light, slightly earthy, and vibrant green, it pairs beautifully with simple ingredients that allow it to shine.

    In a quiche, asparagus becomes tender without losing its character. Paired with parmesan, it creates a balance of freshness and gentle richness. Spring cooking at its best.

    Homemade Asparagus & Parmesan Quiche (Serves: 6)

    Prep time: 15 minutes

    Cook time: 35–40 minutes

    Ingredients

    For the pastry (or use ready-made shortcrust if preferred):

    • 200g plain flour
    • 100g cold butter, cubed
    • Pinch of salt
    • 2–3 tablespoons cold water

    For the filling:

    • 1 bunch fresh asparagus (about 200–250g)
    • 4 large eggs
    • 200ml double cream
    • 50ml milk
    • 75g grated parmesan
    • Salt and freshly ground black pepper
    • Small handful fresh chives or parsley, finely chopped
    • Optional: pinch of lemon zest

    Method

    Step 1: Prepare the pastry

    Rub the butter into the flour and salt until the mixture resembles breadcrumbs. Gradually add cold water until it forms a soft dough.

    Wrap and chill for 20 minutes.

    Roll out and press into a 20–23cm tart tin. Prick the base lightly with a fork.

    Blind bake at 180°C (fan 160°C) for 15 minutes until lightly golden.

    Step 2: Prepare the asparagus

    Trim the woody ends from the asparagus. Cut into smaller pieces, leaving a few full tips for decoration if desired.

    Lightly blanch in boiling water for 1–2 minutes, then drain and pat dry.

    Step 3: Make the filling

    Whisk together the eggs, cream, and milk until smooth.

    Stir in grated parmesan, herbs, salt, and pepper. Add a small pinch of lemon zest if using.

    Step 4: Assemble

    Scatter the asparagus evenly into the baked pastry case. Pour over the egg mixture.

    Arrange reserved asparagus tips on top for a simple decorative finish.

    Step 5: Bake gently

    Return to the oven and bake for 20–25 minutes until just set in the centre and lightly golden.

    The quiche should have a slight wobble in the middle when removed – it will firm up as it cools. Allow to rest for at least 10 minutes before slicing.

    How to Serve Asparagus & Parmesan Quiche

    This quiche is beautifully versatile. Serve warm or at room temperature with:

    For a soft countryside setting, serve on white ceramic plates with extra chives scattered over the top and a wedge of lemon on the side.

    It’s perfect for:

    • A spring lunch with family
    • A quiet garden picnic
    • Easter gatherings
    • A light Sunday supper
    • Afternoon tea with savoury options

    How to Use Leftovers

    Leftover quiche keeps well in the fridge for up to 3 days and can easily become part of another meal.

    Here are a few gentle ideas:

    • Spring Lunch Box
    • Light Supper Plate
    • Open Sandwich
    • Picnic Addition

    Gentle Variations

    To keep this dish aligned with the season, you could:

    • Add a handful of fresh peas
    • Include crumbled goat’s cheese
    • Add sautéed leeks for sweetness
    • Replace some cream with crème fraîche
    • Finish with cracked black pepper and olive oil

    Spring quiche is about simplicity. Let the asparagus remain the focus.

    Final Thoughts

    There’s something timeless about homemade quiche.

    The golden crust.
    The fresh green vegetables.
    The scent of parmesan warming in the oven.

    It feels both traditional and seasonal – comforting yet light. The kind of meal that encourages slower lunches, conversation around the table, and a second slice simply because you can.

    A quiet celebration of spring on a plate.

  • Salmon & Herb Salad: A Light & Fresh Spring Lunch

    Salmon & Herb Salad: A Light & Fresh Spring Lunch

    As the days grow brighter and the air feels softer, meals naturally become lighter.

    Spring invites us to cook with freshness – crisp leaves, fragrant herbs, delicate flavours that feel clean and nourishing. Salmon and herb salad is one of those effortless dishes that feels both simple and quietly elegant.

    Flaked salmon, tender greens, handfuls of fresh herbs, and a bright lemon dressing come together to create something that feels balanced and seasonal.

    It’s the kind of lunch you prepare with the kitchen window open and sunlight streaming across the counter.

    Light, fresh, and softly satisfying.

    Why Salmon Works So Beautifully in Spring

    Salmon offers:

    • Gentle richness without heaviness
    • A soft, flaky texture
    • Versatility in warm or cold dishes
    • Beautiful pairing with citrus and herbs

    When paired with fresh spring herbs and crisp greens, it becomes lighter and more delicate – perfect for the shift away from winter comfort food. It feels nourishing, clean, and thoughtfully prepared.

    Salmon & Herb Salad Recipe (Serves: 2–3)

    Prep time: 15 minutes

    Cook time: 8–10 minutes

    Ingredients

    For the salmon:

    • 2 salmon fillets (skin on or off)
    • 1 tablespoon olive oil
    • Sea salt
    • Freshly ground black pepper
    • Squeeze of lemon

    For the salad:

    • 2 large handfuls mixed salad leaves
    • Small handful fresh parsley, finely chopped
    • Small handful fresh dill
    • Small handful fresh chives, sliced
    • ½ cucumber, thinly sliced
    • 4–5 radishes, thinly sliced
    • Optional: small handful fresh peas

    For the dressing:

    • 2 tablespoons olive oil
    • 1 tablespoon lemon juice
    • ½ teaspoon honey
    • Pinch of salt
    • Black pepper

    Optional additions:

    • Crumbled feta
    • Avocado slices
    • Toasted seeds

    Recipe

    Step 1: Cook the salmon

    Pat the salmon dry and season with salt and pepper.

    Heat olive oil in a pan over medium heat. Cook the salmon for 4–5 minutes on one side, then carefully turn and cook for a further 2–4 minutes until just cooked through. Finish with a squeeze of lemon. Allow to rest slightly before flaking gently with a fork.

    Alternatively, roast at 180°C for 10–12 minutes.

    Step 2: Prepare the salad

    In a large bowl, combine:

    • Mixed leaves
    • Cucumber
    • Radishes
    • Fresh herbs
    • Peas (if using)

    The herbs should feel generous – they are what make this salad distinctly spring.

    Step 3: Make the dressing

    Whisk together olive oil, lemon juice, honey, salt, and pepper until lightly emulsified.

    Step 4: Assemble gently

    Toss the salad lightly with the dressing. Scatter flaked salmon over the top and add any optional extras.

    Serve immediately.

    How to Serve Salmon & Herb Salad

    This salad pairs beautifully with:

    It’s perfect for:

    • A light spring lunch
    • A soft Sunday afternoon meal
    • Garden gatherings
    • Easter tables
    • A nourishing midweek reset

    For a countryside table aesthetic, serve in a wide white bowl with extra herbs scattered over the top and lemon wedges on the side.

    How to Use Leftovers

    If you have leftover salmon or salad components, here are gentle ways to repurpose them:

    • Spring Sandwich
    • Grain Bowl
    • Brunch Plate
    • Wrap Filling

    Gentle Variations

    To keep this dish seasonal and adaptable, you could:

    • Add blanched asparagus
    • Include shaved fennel for crunch
    • Swap lemon for a light vinaigrette
    • Add capers for saltiness
    • Finish with lemon zest

    The key is balance – richness from the salmon, brightness from citrus, freshness from herbs.

    Final Thoughts

    Salmon & herb salad is not complicated food. It’s thoughtful food. It honours the season – fresh greens, fragrant herbs, gentle flavours layered simply.

    Spring cooking often feels like this: lighter, cleaner, more intentional. A meal that nourishes without weighing you down. A plate that looks as fresh as it tastes. And sometimes, that is exactly what the season calls for.

  • Buttered New Potatoes: A Simple & Comforting Spring Side Dish

    Buttered New Potatoes: A Simple & Comforting Spring Side Dish

    There is something quietly special about new potatoes in spring.

    Small, delicate, and softly earthy, they feel like the first true taste of the season. Their skins are thin, their texture tender, and their flavour subtle enough to pair with almost anything.

    Buttered new potatoes are not complicated. They don’t need to be.

    They are the kind of side dish that sits at the centre of a spring table – steaming gently, flecked with herbs, finished with sea salt and black pepper.

    Simple food, done well.

    Why New Potatoes Feel Like Spring

    New potatoes are harvested young, which gives them:

    • Thin, delicate skins
    • A naturally sweet flavour
    • A creamy texture
    • Quick cooking times

    They pair beautifully with lighter spring meals — pan-seared salmon, roast chicken, asparagus quiche, or a simple garden salad.

    When tossed with butter and fresh herbs, they feel comforting without heaviness.

    A soft bridge between winter warmth and summer lightness.

    Buttered New Potatoes Recipe (Serves: 4)

    Prep time: 5 minutes

    Cook time: 15–20 minutes

    Ingredients

    • 750g new potatoes (washed, larger ones halved)
    • 40g salted butter
    • Small handful fresh parsley, finely chopped
    • Small handful fresh chives, finely sliced
    • Sea salt
    • Freshly ground black pepper
    • Optional: squeeze of lemon juice

    Recipe

    Step 1: Prepare the potatoes

    Rinse the new potatoes gently to remove any soil, keeping their skins intact.

    If any are larger, cut them in half so they cook evenly.

    Step 2: Boil gently

    Place the potatoes in a saucepan and cover with cold, salted water. Bring to a gentle boil, then reduce to a steady simmer. Cook for 15–20 minutes, or until tender when pierced with a knife.

    Step 3: Drain & steam dry

    Drain well and allow them to sit in the warm pan for a minute or two. This helps excess moisture evaporate.

    Step 4: Add butter & herbs

    Add the butter to the warm potatoes and gently toss until melted and glossy. Stir through fresh parsley and chives. Season with sea salt and black pepper. If desired, add a very small squeeze of lemon juice to brighten the flavour.

    Serve immediately.

    How to Serve Buttered New Potatoes

    These potatoes pair beautifully with:

    They’re equally perfect for:

    • A slow Sunday lunch
    • A spring garden gathering
    • Easter tables
    • Light midweek dinners
    • Picnic spreads (served at room temperature)

    For a soft countryside aesthetic, serve in a white ceramic bowl with extra herbs scattered over the top and a knob of butter melting gently in the centre.

    How to Use Leftovers

    Leftover new potatoes can become something entirely new the next day.

    Here are a few gentle ideas:

    • crispy smashed potatoes
    • warm potato salad
    • breakfast hash
    • garlic butter potatoes

    Gentle Variations

    To keep this dish feeling seasonal, you could:

    • Add fresh dill instead of parsley
    • Stir through crème fraîche for creaminess
    • Add crushed garlic butter
    • Finish with flaky sea salt
    • Toss with peas and mint

    New potatoes are wonderfully adaptable – but their charm lies in simplicity.

    Final Thoughts

    Buttered new potatoes don’t try to be impressive. They don’t need bold sauces or elaborate preparation. They simply ask for good butter, fresh herbs, and a little care.

    And sometimes, that’s enough. Spring meals often feel lighter, slower, and more intentional. A bowl of tender potatoes passed around the table captures that feeling perfectly. Warm. Simple. Seasonal. A small celebration of the season’s first harvest.

  • Pan-Seared Salmon: A Light & Fresh Spring Meal

    Pan-Seared Salmon: A Light & Fresh Spring Meal

    As spring settles in, meals begin to feel lighter.

    We move away from heavy winter dishes and start craving food that feels fresh, simple, and nourishing. Pan-seared salmon is one of those perfect in-between meals – warm but not heavy, comforting yet bright.

    Served with tender greens, new potatoes, or a crisp lemon vinaigrette salad, it feels elegant enough for a weekend lunch and simple enough for a midweek supper.

    It’s the kind of dish you make with the kitchen window slightly open, sunlight pouring across the counters, and a jug of fresh water on the table.

    Why Salmon Feels Perfect in Spring

    Spring cooking often leans into:

    • Fresh herbs
    • Citrus flavours
    • Seasonal greens
    • Lighter proteins
    • Simple, clean ingredients

    Salmon pairs beautifully with all of these. Its richness balances sharp lemon, delicate herbs, and crisp vegetables without overpowering them.

    It’s nourishing, satisfying, and quietly elegant.

    Pan-Seared Salmon Recipe (serves: 2)

    Prep time: 5 minutes

    Cook time: 8–10 minutes

    Ingredients

    • 2 fresh salmon fillets (skin on)
    • 1 tablespoon olive oil
    • 1 tablespoon butter
    • Salt, to taste
    • Freshly ground black pepper
    • ½ lemon
    • Small handful fresh parsley or dill, finely chopped
    • Optional: 1 small garlic clove, lightly crushed

    Recipe

    Step 1: Prepare the salmon

    Pat the salmon fillets dry with kitchen paper. This helps create a crisp golden skin.

    Season both sides lightly with salt and black pepper.

    Step 2: Heat the pan

    Place a frying pan over medium-high heat. Add the olive oil and allow it to heat until shimmering.

    Step 3: Cook skin-side down

    Place the salmon fillets skin-side down in the pan. Press gently with a spatula for the first 10 seconds to prevent curling.

    Cook for 4–5 minutes without moving them. The skin should become crisp and golden.

    Step 4: Flip and finish

    Turn the salmon carefully. Add the butter (and garlic if using) to the pan.

    Cook for a further 2–4 minutes, spooning the melted butter over the top as it finishes cooking.

    The centre should be just opaque and flake easily with a fork.

    Step 5: Finish with freshness

    Remove from heat. Squeeze fresh lemon juice over the top and sprinkle with chopped herbs.

    Let rest for a minute before serving.

    How to Serve Pan-Seared Salmon in Spring

    This dish pairs beautifully with light seasonal sides. You might serve it with:

    For a softer, countryside table setting, serve on white ceramic plates with fresh herbs scattered loosely and lemon wedges on the side.

    It works equally well for:

    • A slow Sunday lunch
    • A light spring dinner
    • A small garden gathering
    • A quiet midweek reset meal

    How to Use Leftover Salmon

    Leftover salmon keeps beautifully in the fridge for up to 2 days and can transform into effortless next-day meals.

    Here are a few gentle ideas:

    • Salmon & Herb Salad
    • Salmon & Cream Cheese Sandwich
    • Salmon & Cream Cheese Sandwich
    • Salmon Brunch
    • Salmon Grain Bowl
    • Light Salmon Pasta

    Gentle Variations

    To adapt this for different spring moods:

    • Add a honey-mustard glaze before finishing
    • Serve with a spoonful of Greek yoghurt mixed with lemon zest
    • Add capers for brightness
    • Finish with crushed pink peppercorns
    • Pair with a chilled elderflower spritzer

    A Simple Spring Reminder

    Spring meals don’t need to be complicated.

    Sometimes the most satisfying dishes are the simplest – fresh ingredients, cooked well, served thoughtfully.

    Pan-seared salmon feels like a celebration of the season without trying too hard. Light. Clean. Comforting. Nourishing.

    A quiet kind of luxury.

  • Creamy Garlic Risotto: A Soft & Comforting Spring Dinner

    Creamy Garlic Risotto: A Soft & Comforting Spring Dinner

    As the evenings grow lighter but still carry a little chill, dinner calls for something warm yet not too heavy.

    Creamy garlic risotto sits beautifully in this space between seasons. It’s comforting without feeling winter-rich. Soft, silky rice infused with gentle garlic, finished with parmesan and a squeeze of lemon – simple ingredients turned into something quietly elegant.

    It’s the kind of meal you stir slowly at the stove while the kitchen windows are slightly open, birds settling outside, daylight stretching just a little longer.

    A spring supper that feels both grounding and fresh.

    Why Risotto Works So Well in Spring

    Spring cooking often means:

    • Lightened comfort food
    • Simple seasonal ingredients
    • Gentle herbs
    • Subtle citrus brightness
    • Meals that feel cosy but not heavy

    Risotto offers warmth without heaviness. When balanced with garlic, fresh herbs, and a hint of lemon, it feels like the perfect bridge between winter comfort and summer freshness.

    Creamy Garlic Risotto Recipe (Serves: 2–3)

    Prep time: 5 minutes

    Cook time: 25–30 minutes

    Ingredients

    • 200g arborio rice
    • 1 litre hot vegetable stock
    • 1 small onion, finely diced
    • 2 garlic cloves, finely minced
    • 1 tablespoon olive oil
    • 1 tablespoon butter
    • 50g grated parmesan
    • Salt and freshly ground black pepper
    • Squeeze of fresh lemon juice
    • Small handful fresh parsley, finely chopped

    Optional additions:

    • Splash of white wine (about 60ml)
    • 2 tablespoons crème fraîche for extra creaminess
    • Handful of fresh spinach

    Recipe

    Step 1: Warm the stock

    Keep your vegetable stock gently simmering in a saucepan nearby. Adding warm stock helps the rice cook evenly.

    Step 2: Soften the base

    In a wide pan, heat the olive oil and butter over medium heat.
    Add the onion and cook gently for 3–4 minutes until soft and translucent.

    Add the garlic and cook for another 30 seconds until fragrant.

    Step 3: Toast the rice

    Stir in the arborio rice and cook for 1–2 minutes, allowing it to lightly toast and absorb the flavours.

    If using white wine, add it now and allow it to cook off gently.

    Step 4: Add stock gradually

    Add one ladle of warm stock to the rice, stirring gently until mostly absorbed.

    Continue adding stock gradually, stirring frequently. This process should take around 20–25 minutes.

    The rice should become creamy and tender with a slight bite in the centre.

    Step 5: Finish softly

    Once the rice is cooked:

    • Stir in grated parmesan
    • Add a small squeeze of lemon juice
    • Season with salt and black pepper
    • Fold through fresh parsley

    If using spinach or crème fraîche, stir through at this stage.

    The risotto should be silky and softly flowing – not stiff.

    Let it rest for 1–2 minutes before serving.

    How to Serve Creamy Garlic Risotto in Spring

    This dish pairs beautifully with light seasonal additions:

    For a gentle countryside table setting, serve in shallow bowls with an extra sprinkle of parmesan and fresh herbs.

    Add a wedge of lemon for brightness.

    It works beautifully for:

    • A quiet spring dinner
    • A soft Sunday evening meal
    • A small garden gathering
    • A comforting midweek reset

    How to Use Leftover Risotto

    Leftover risotto can feel even more indulgent the next day.

    Here are a few thoughtful ways to use it:

    Crispy Risotto Cakes

    Shape chilled risotto into small patties and pan-fry until golden and crisp on both sides. Serve with a spoonful of yoghurt and herbs.

    Stuffed Peppers

    Use risotto as a filling for halved bell peppers and bake until warmed through.

    Warm Grain Bowl

    Reheat gently and serve with roasted vegetables and a drizzle of olive oil.

    Arancini-Style Bites

    Roll into balls, coat lightly in breadcrumbs, and bake or fry until crisp for a small spring gathering.

    Leftovers become something new – intentional rather than repetitive.

    Gentle Spring Variations

    To keep this dish aligned with the season, you could:

    • Add fresh peas for sweetness
    • Stir through wild garlic if in season
    • Add lemon zest for extra brightness
    • Top with shaved parmesan curls
    • Finish with cracked black pepper and olive oil

    Spring risotto is about softness and balance – creamy but light, rich but fresh.

    A Quiet Spring Evening

    Creamy garlic risotto is not rushed food.

    It asks you to stir slowly. To pause. To notice.

    The soft bubbling of stock. The scent of garlic warming in butter. The gentle rhythm of adding and stirring.

    It’s a dinner that mirrors the season – steady, calm, quietly beautiful.

    And sometimes, that’s exactly what a spring evening calls for.